¶ BO Inventory - Stock In / Stock Out using Serial Number
Note: This guide is applicable for both stock in and stock out actions. This guide is being created with stock in activity as a reference.
¶ Guided Mode (for stock in and stock out)
1. Open BO Inventory app. When you reach the main screen, please ensure that you are on the right tab by checking on the bottom screen depending on the actions you would like to take (Stock In or Stock Out)
2. Click on the (+) icon on the top panel in between From and To. Click on the document section and you will be redirected to another screen.
3. Choose the document that you would like to select to perform your stock in/out and click Confirm.
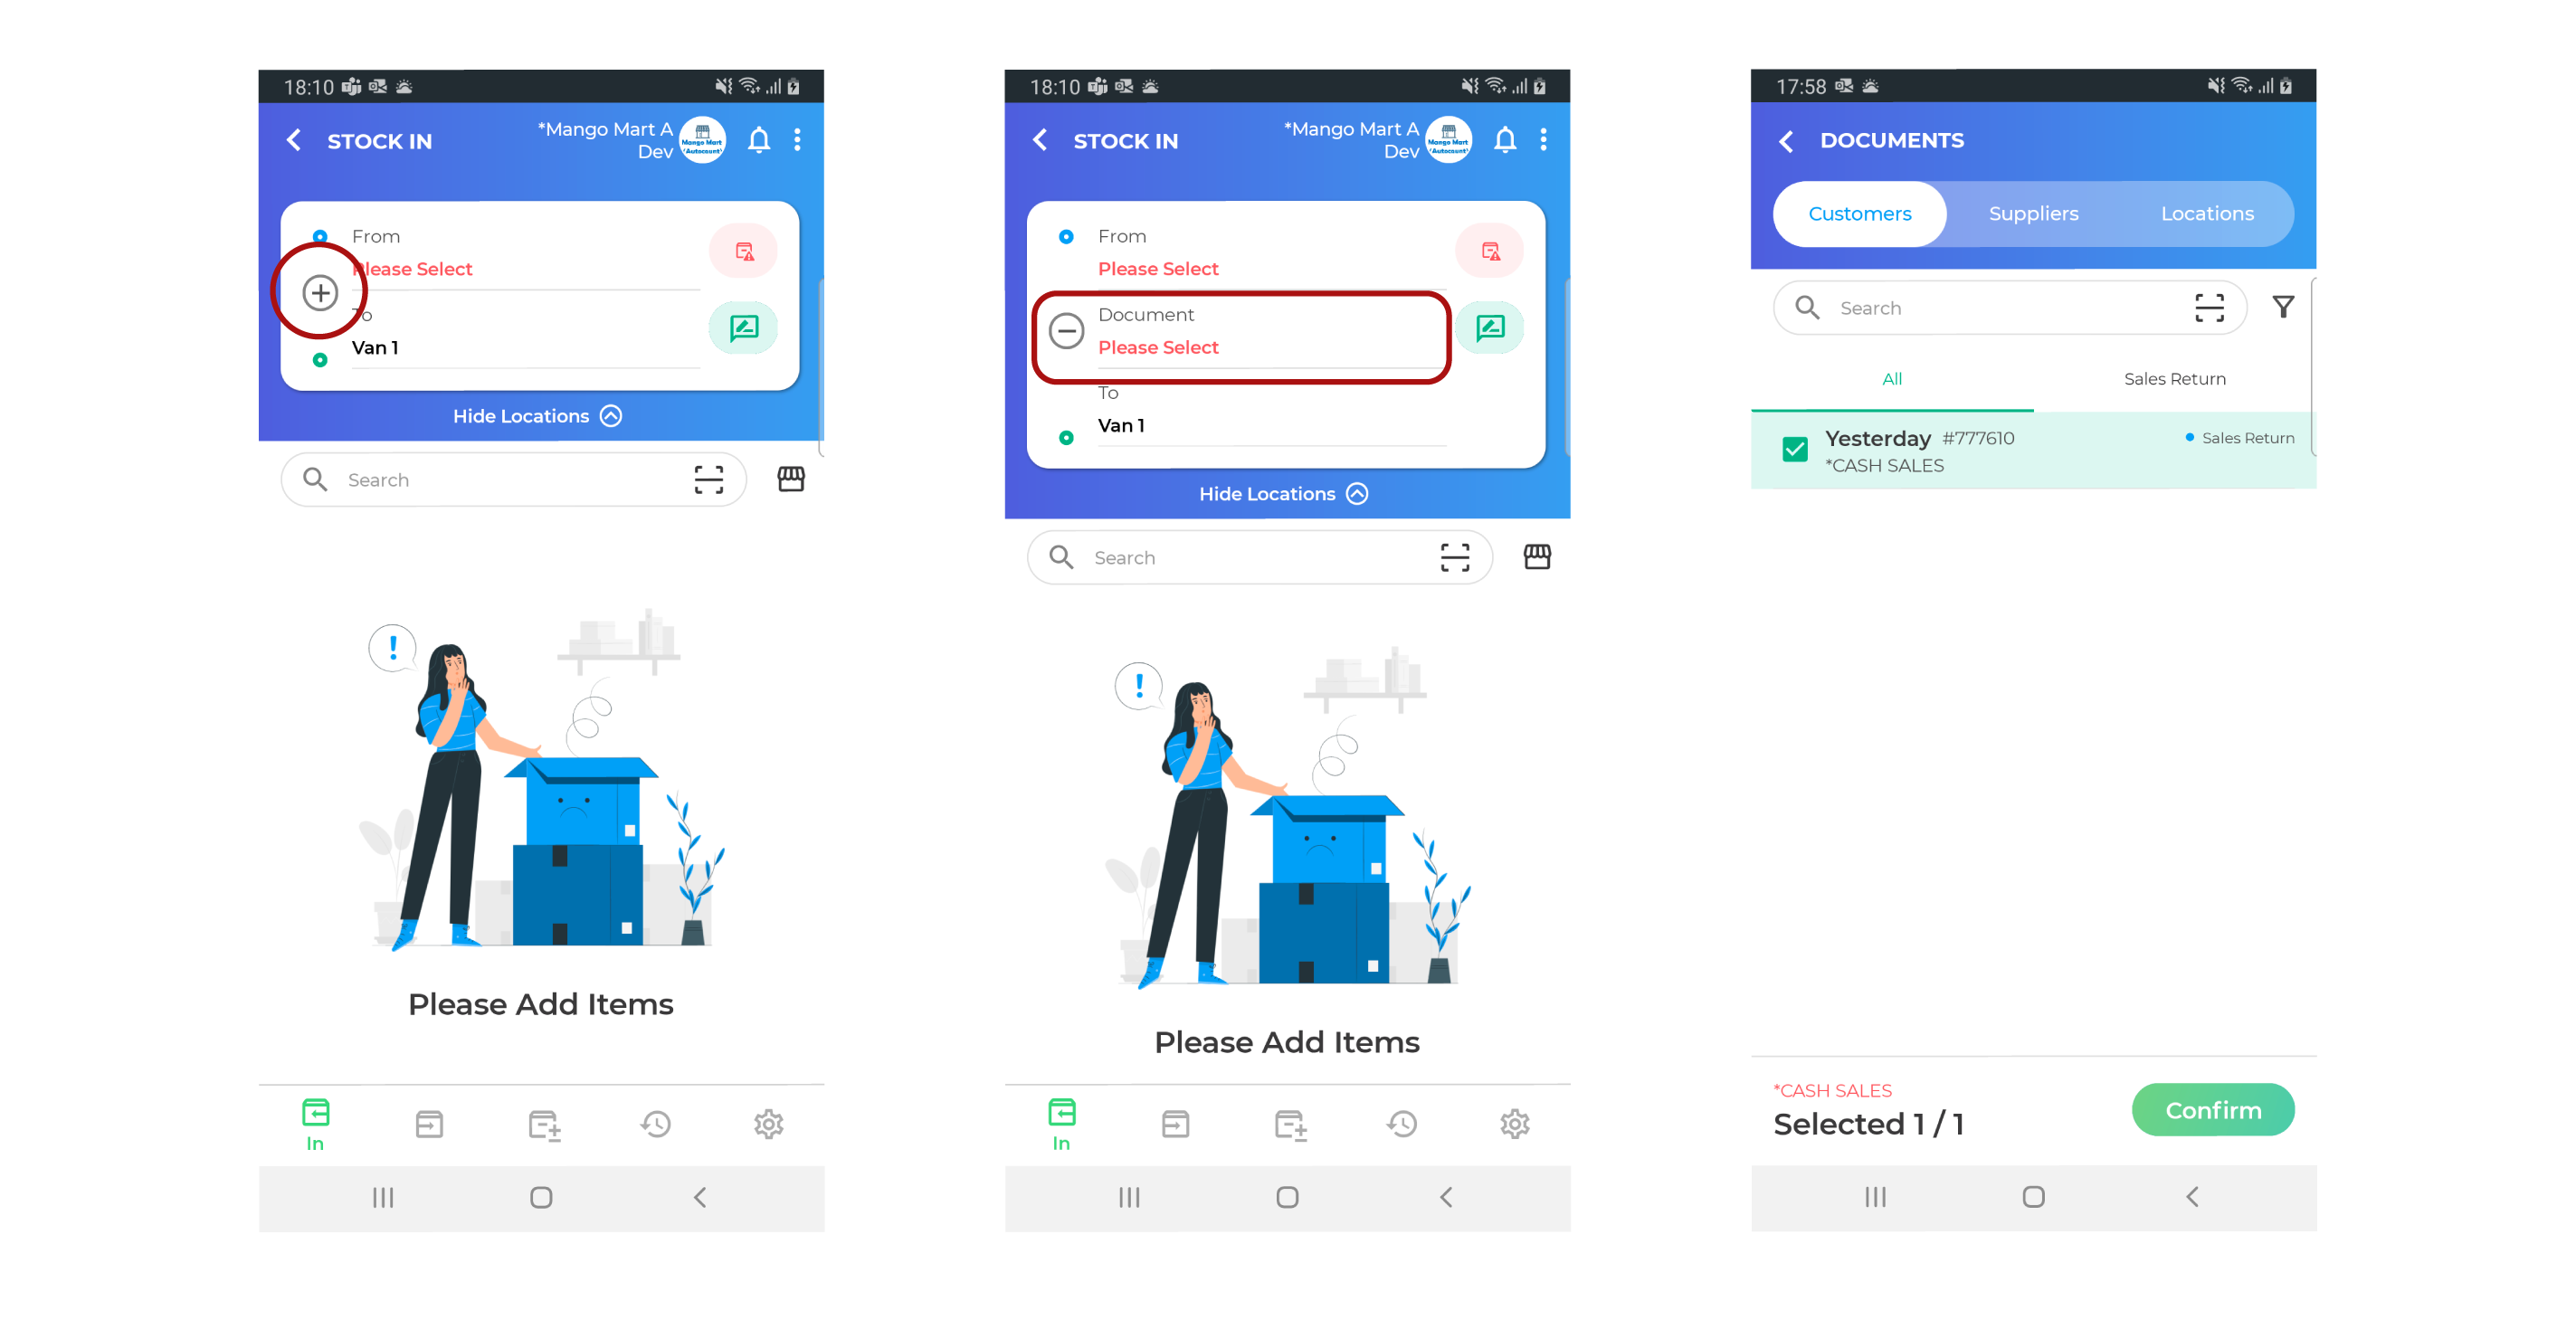
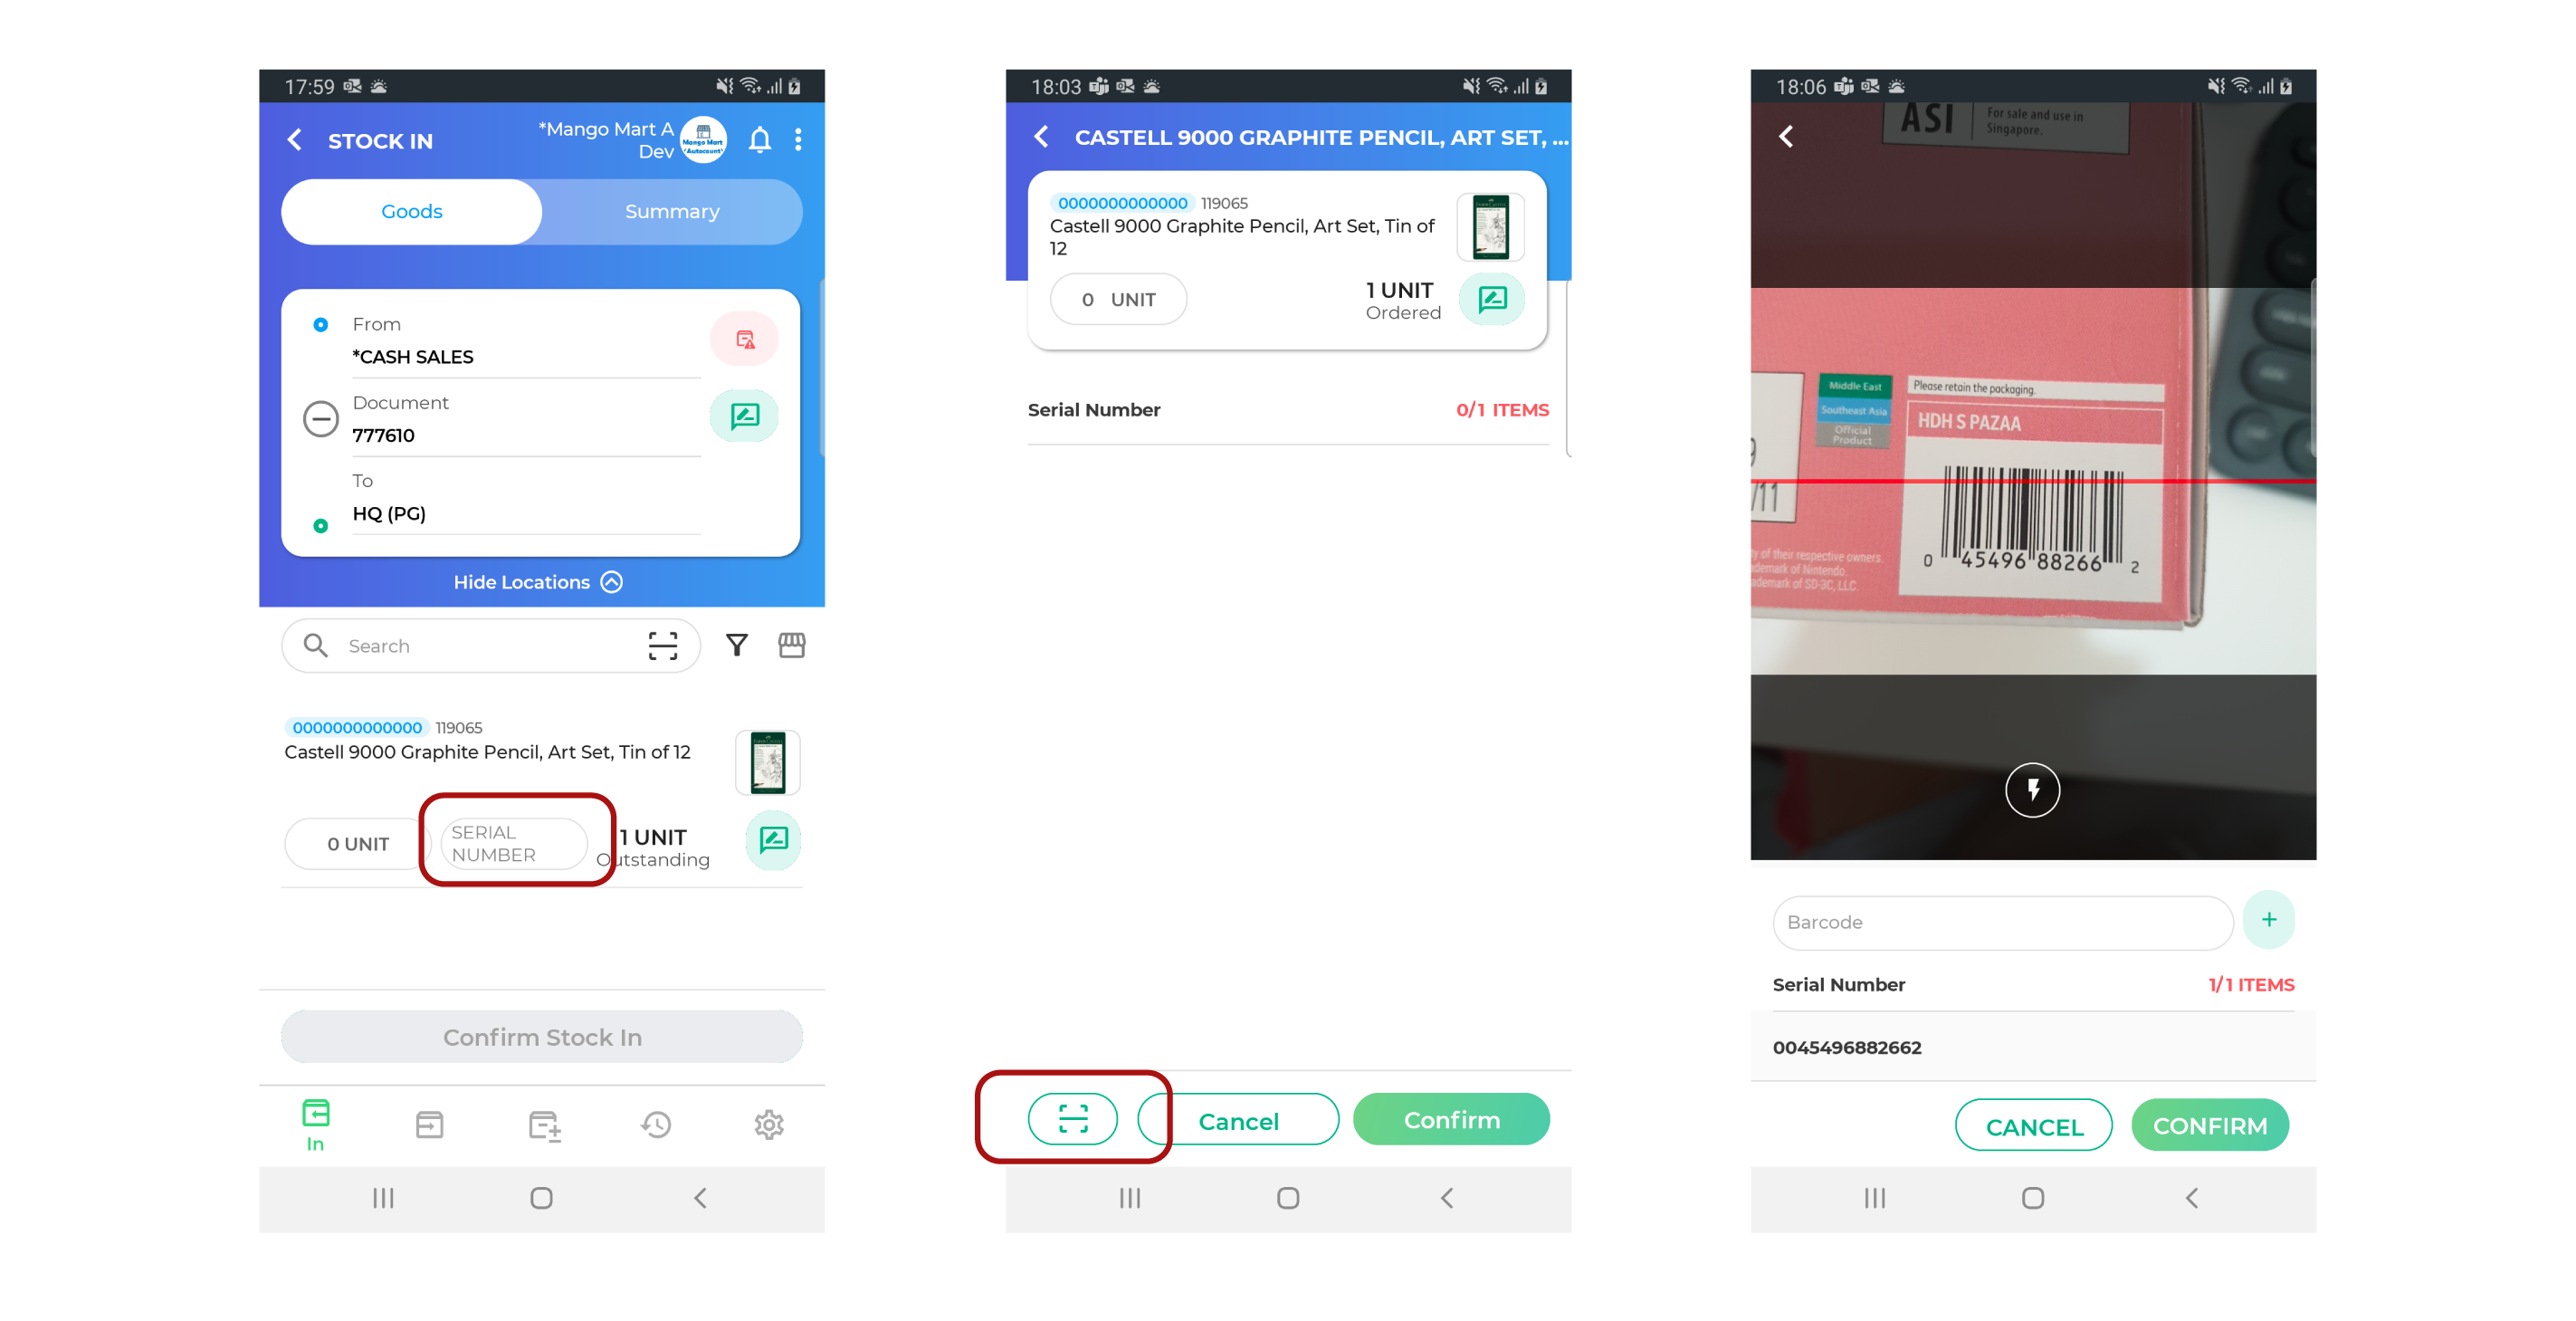
4. You will then return to the main screen with the item(s) in the document. Click on the serial number field.
5. Click on the scan icon on the bottom left of the screen. Your camera function will be turned on. Scan the serial number of the item and you should be able to see the number listed at the bottom panel as you do so. Once you've done so, click Confirm.
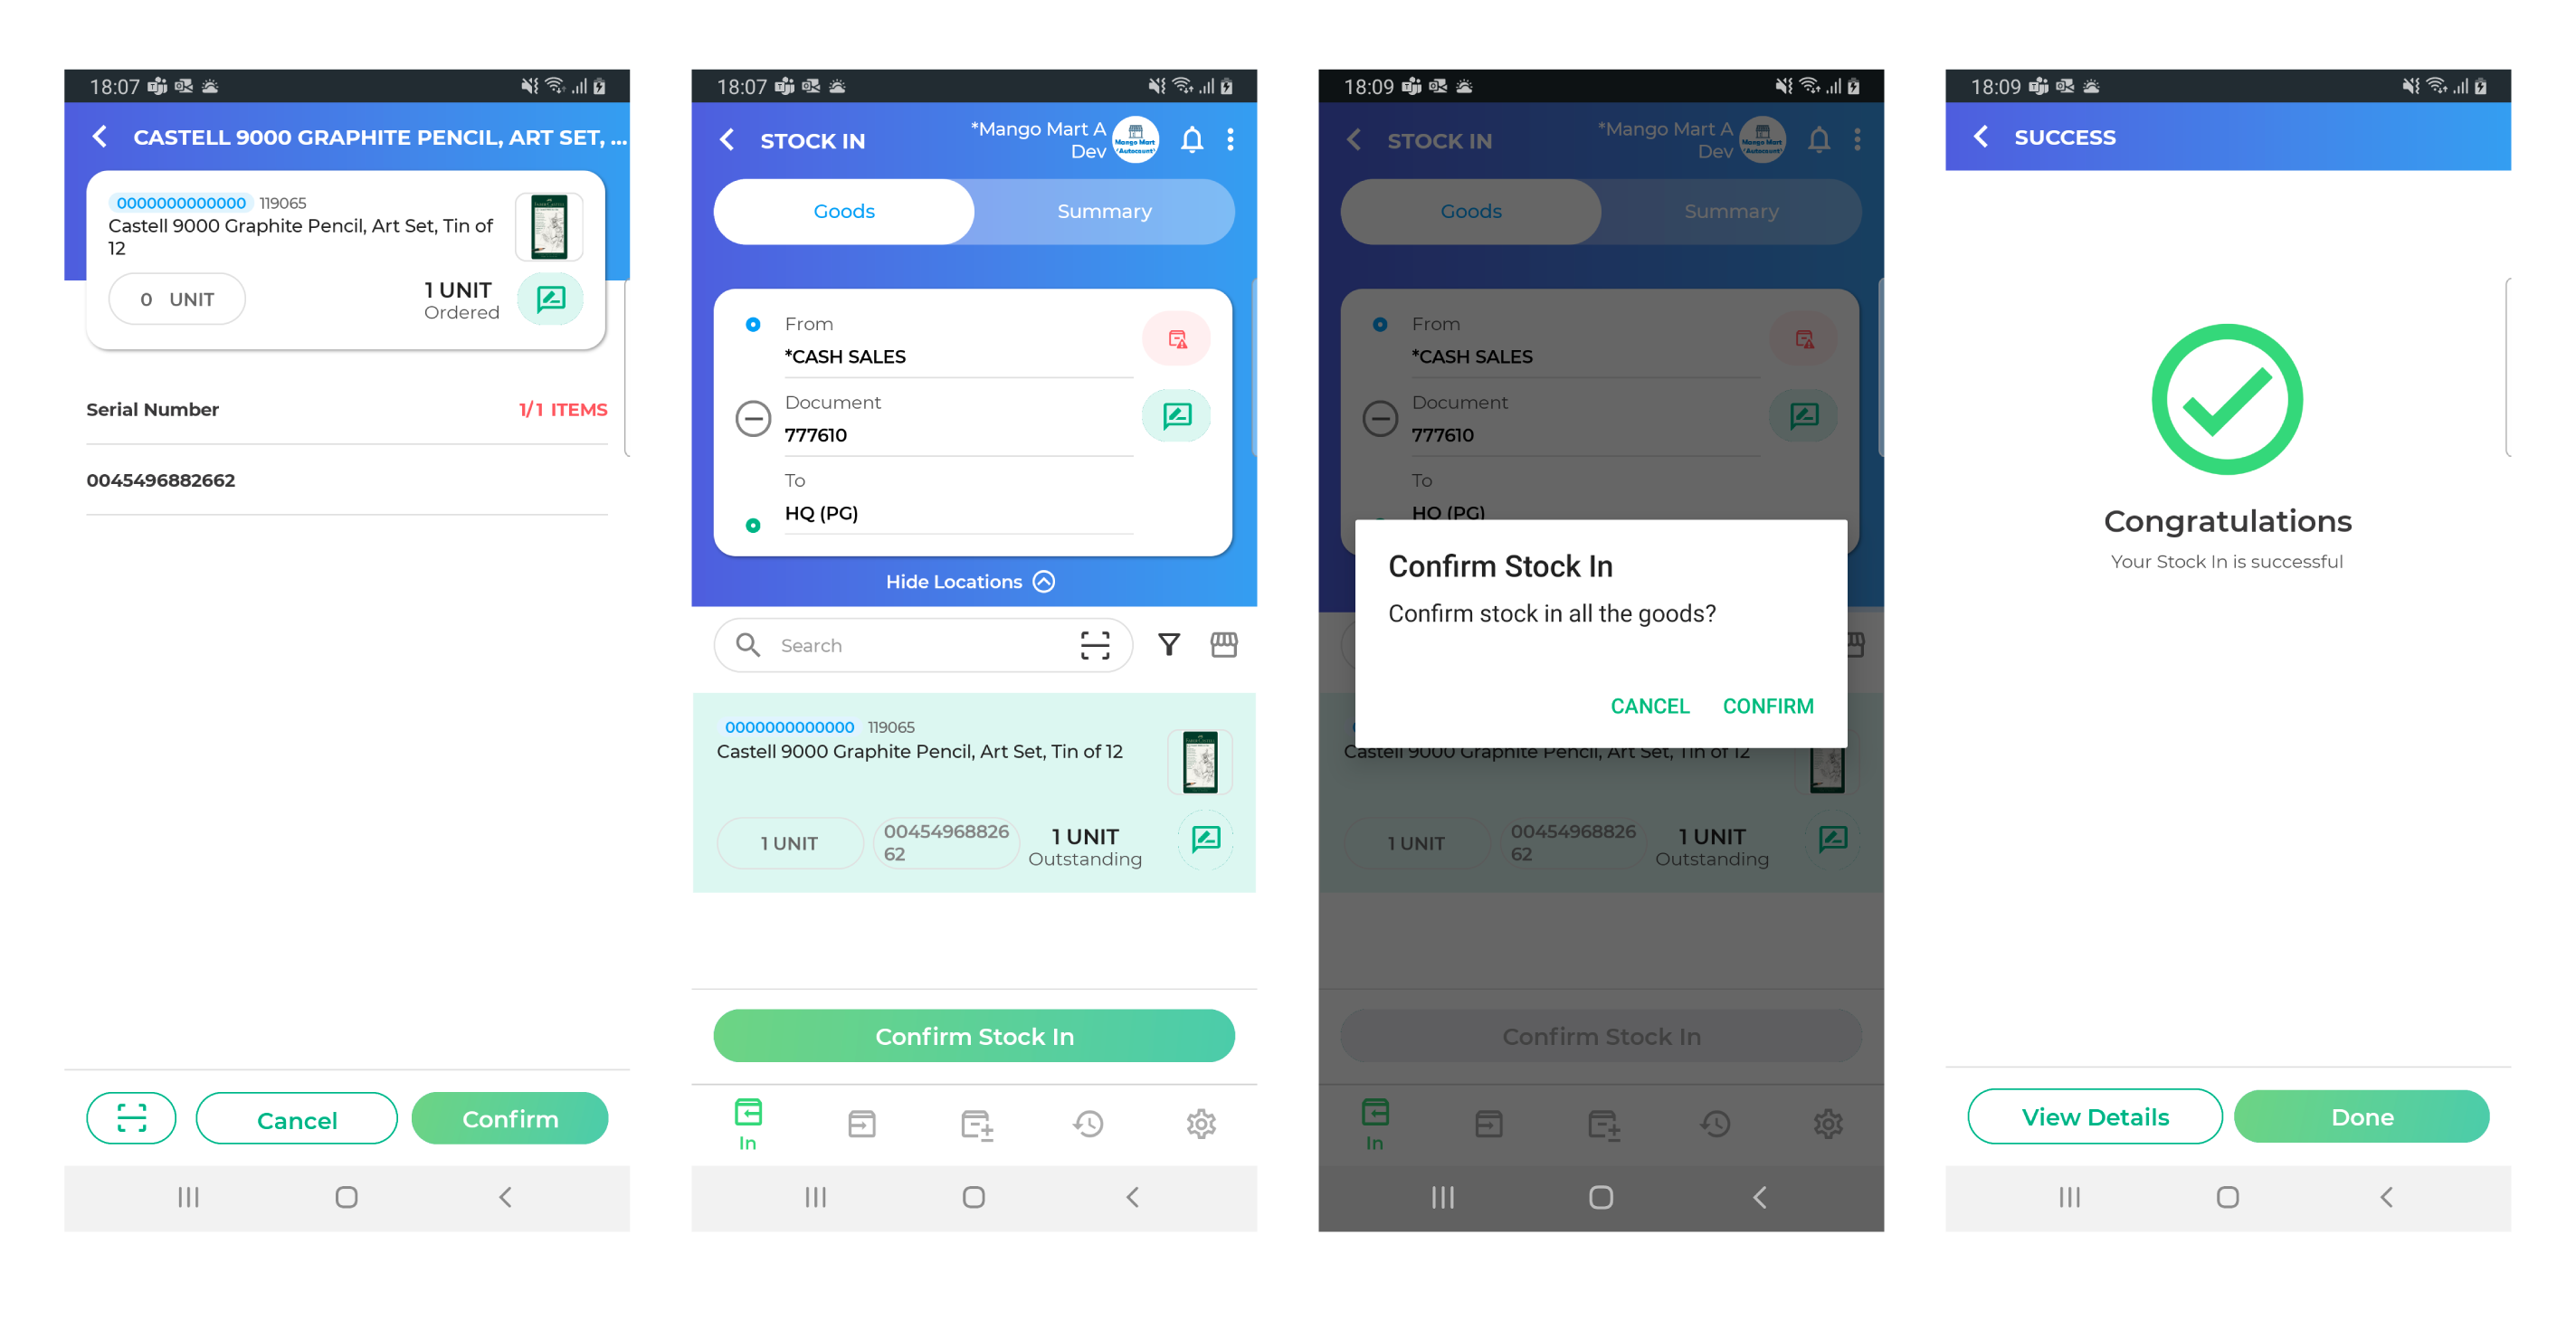
6. At the item summary page, click Confirm, and you will be redirected back to the main screen. Click Confirm Stock-In, follow the rest of the confirmation prompt until you see the success confirmation screen. Click Done.
¶ Unguided Mode (for stock in and stock out)
1. Open BO Inventory app. When you reach the main screen, please ensure that you are on the right tab by checking on the bottom screen depending on the actions you would like to take (Stock In or Stock Out)
2. Click on the store icon. Choose the item that you would like to perform an action by clicking on the green button on the right side of the item itself.
3. Insert the quantity and click Confirm, and you will be redirected back to the main screen. You can also edit the quantity of the item(s) in the main screen later.
4. Click on the serial number field.
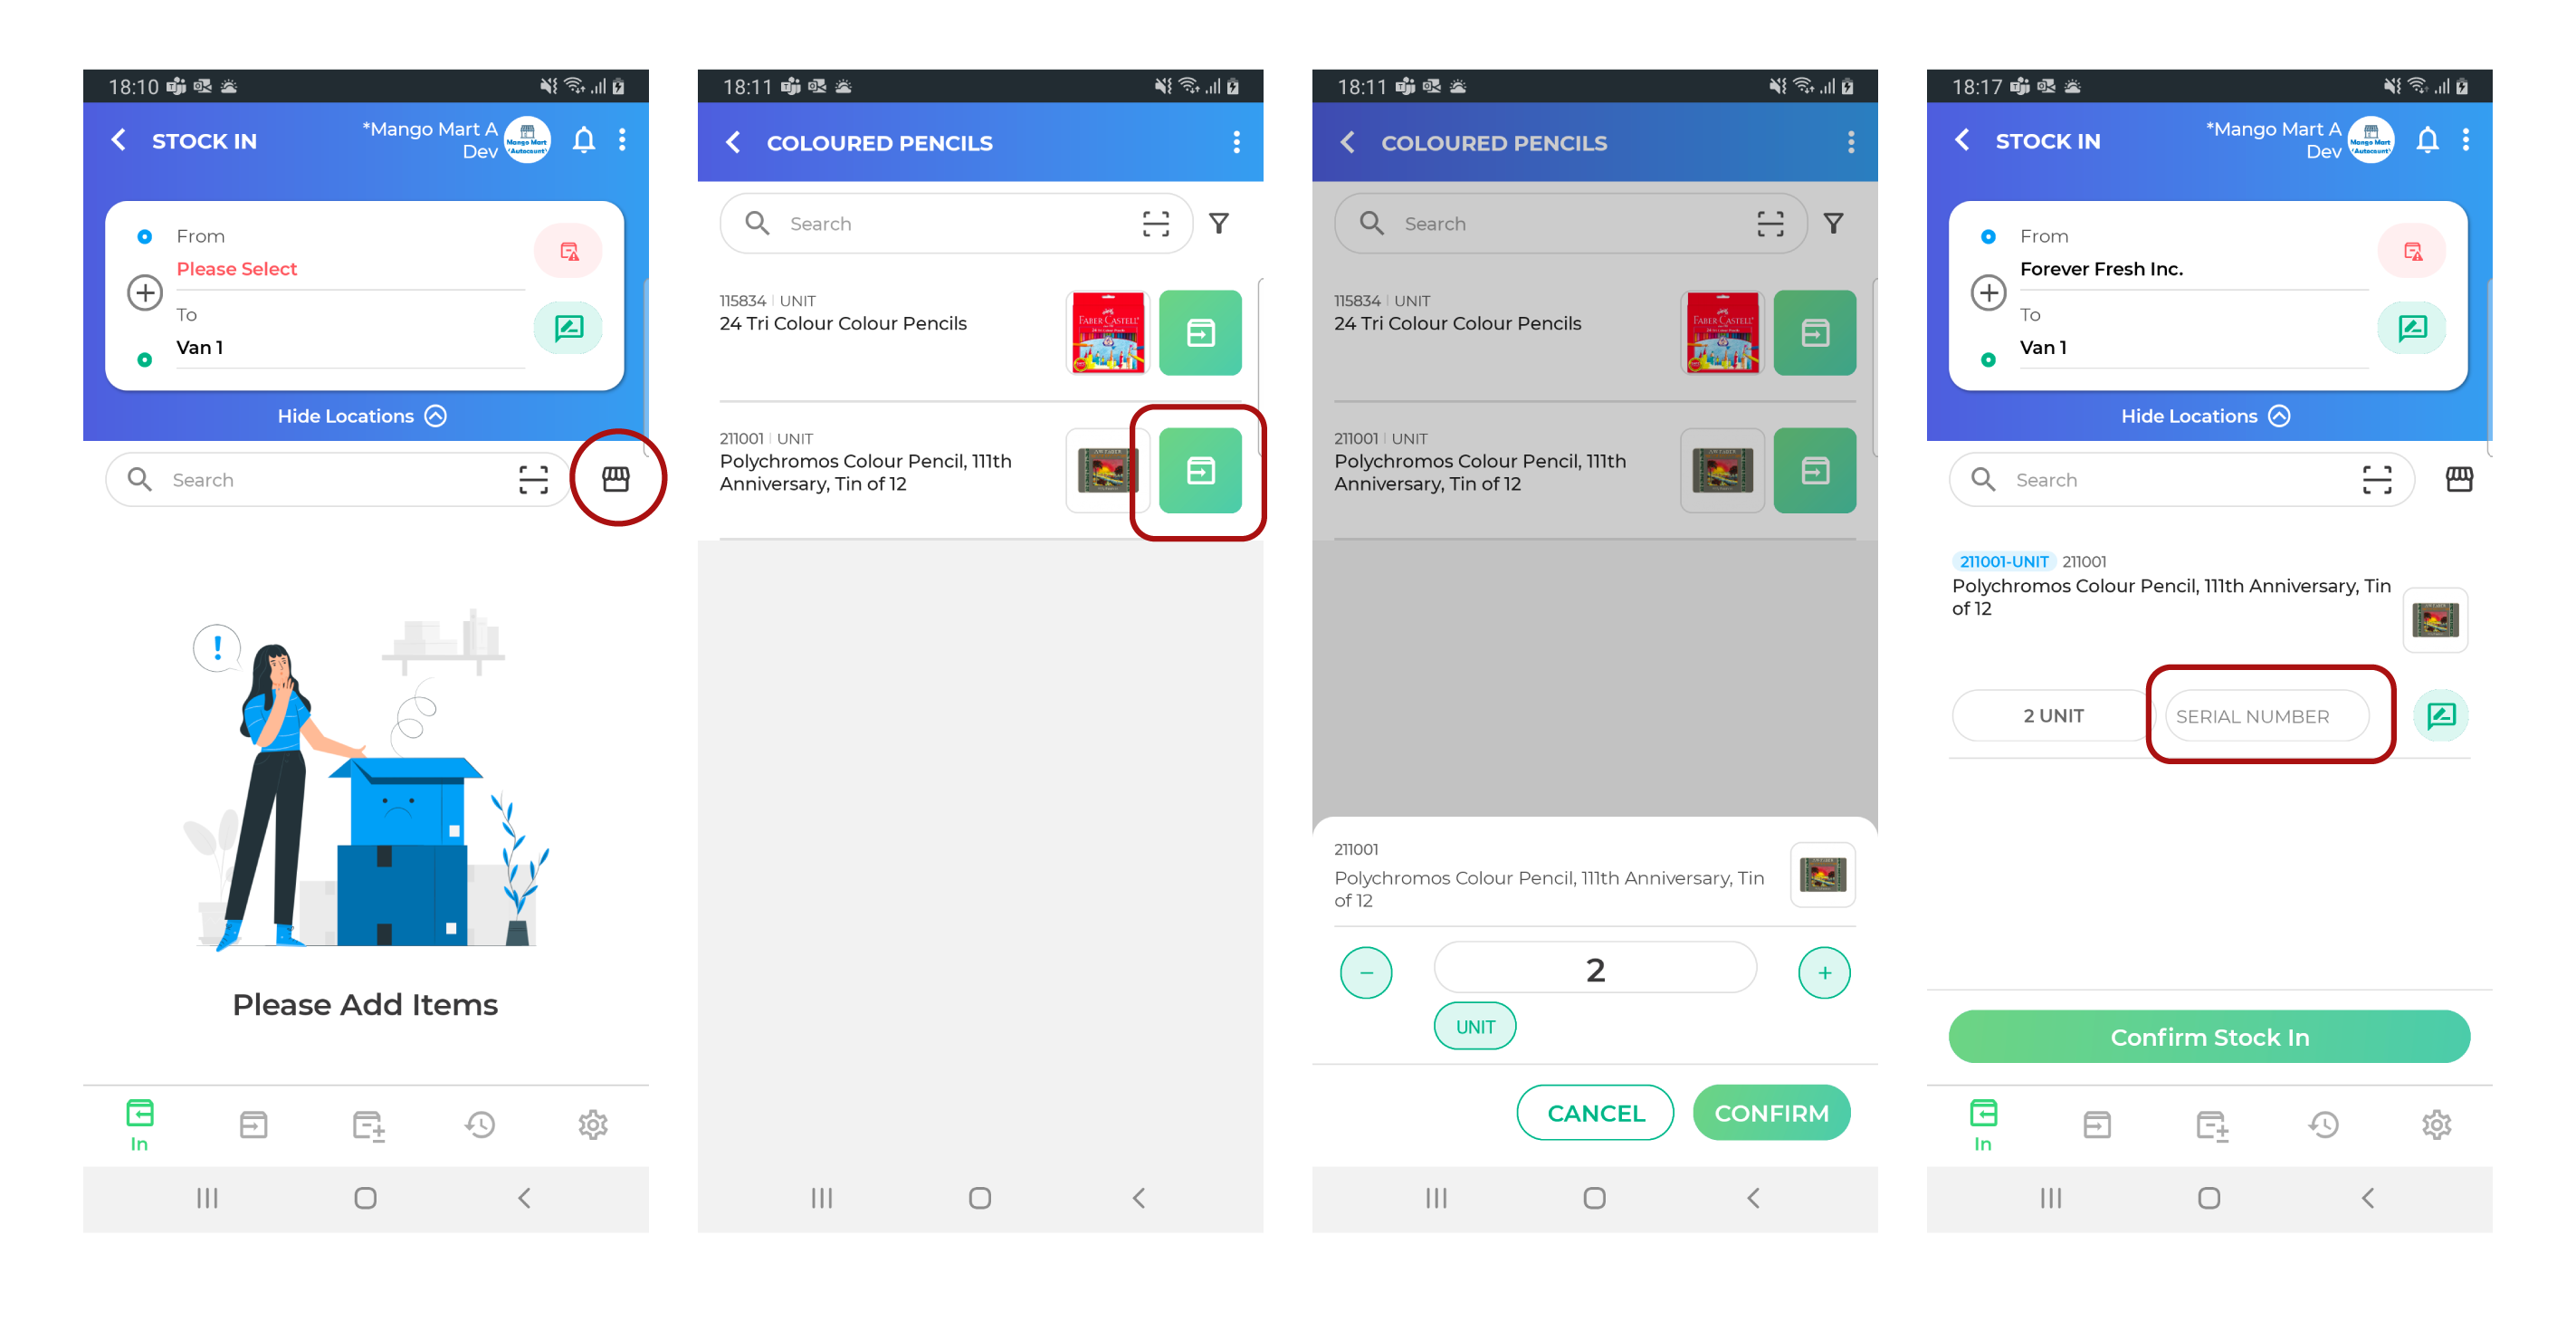
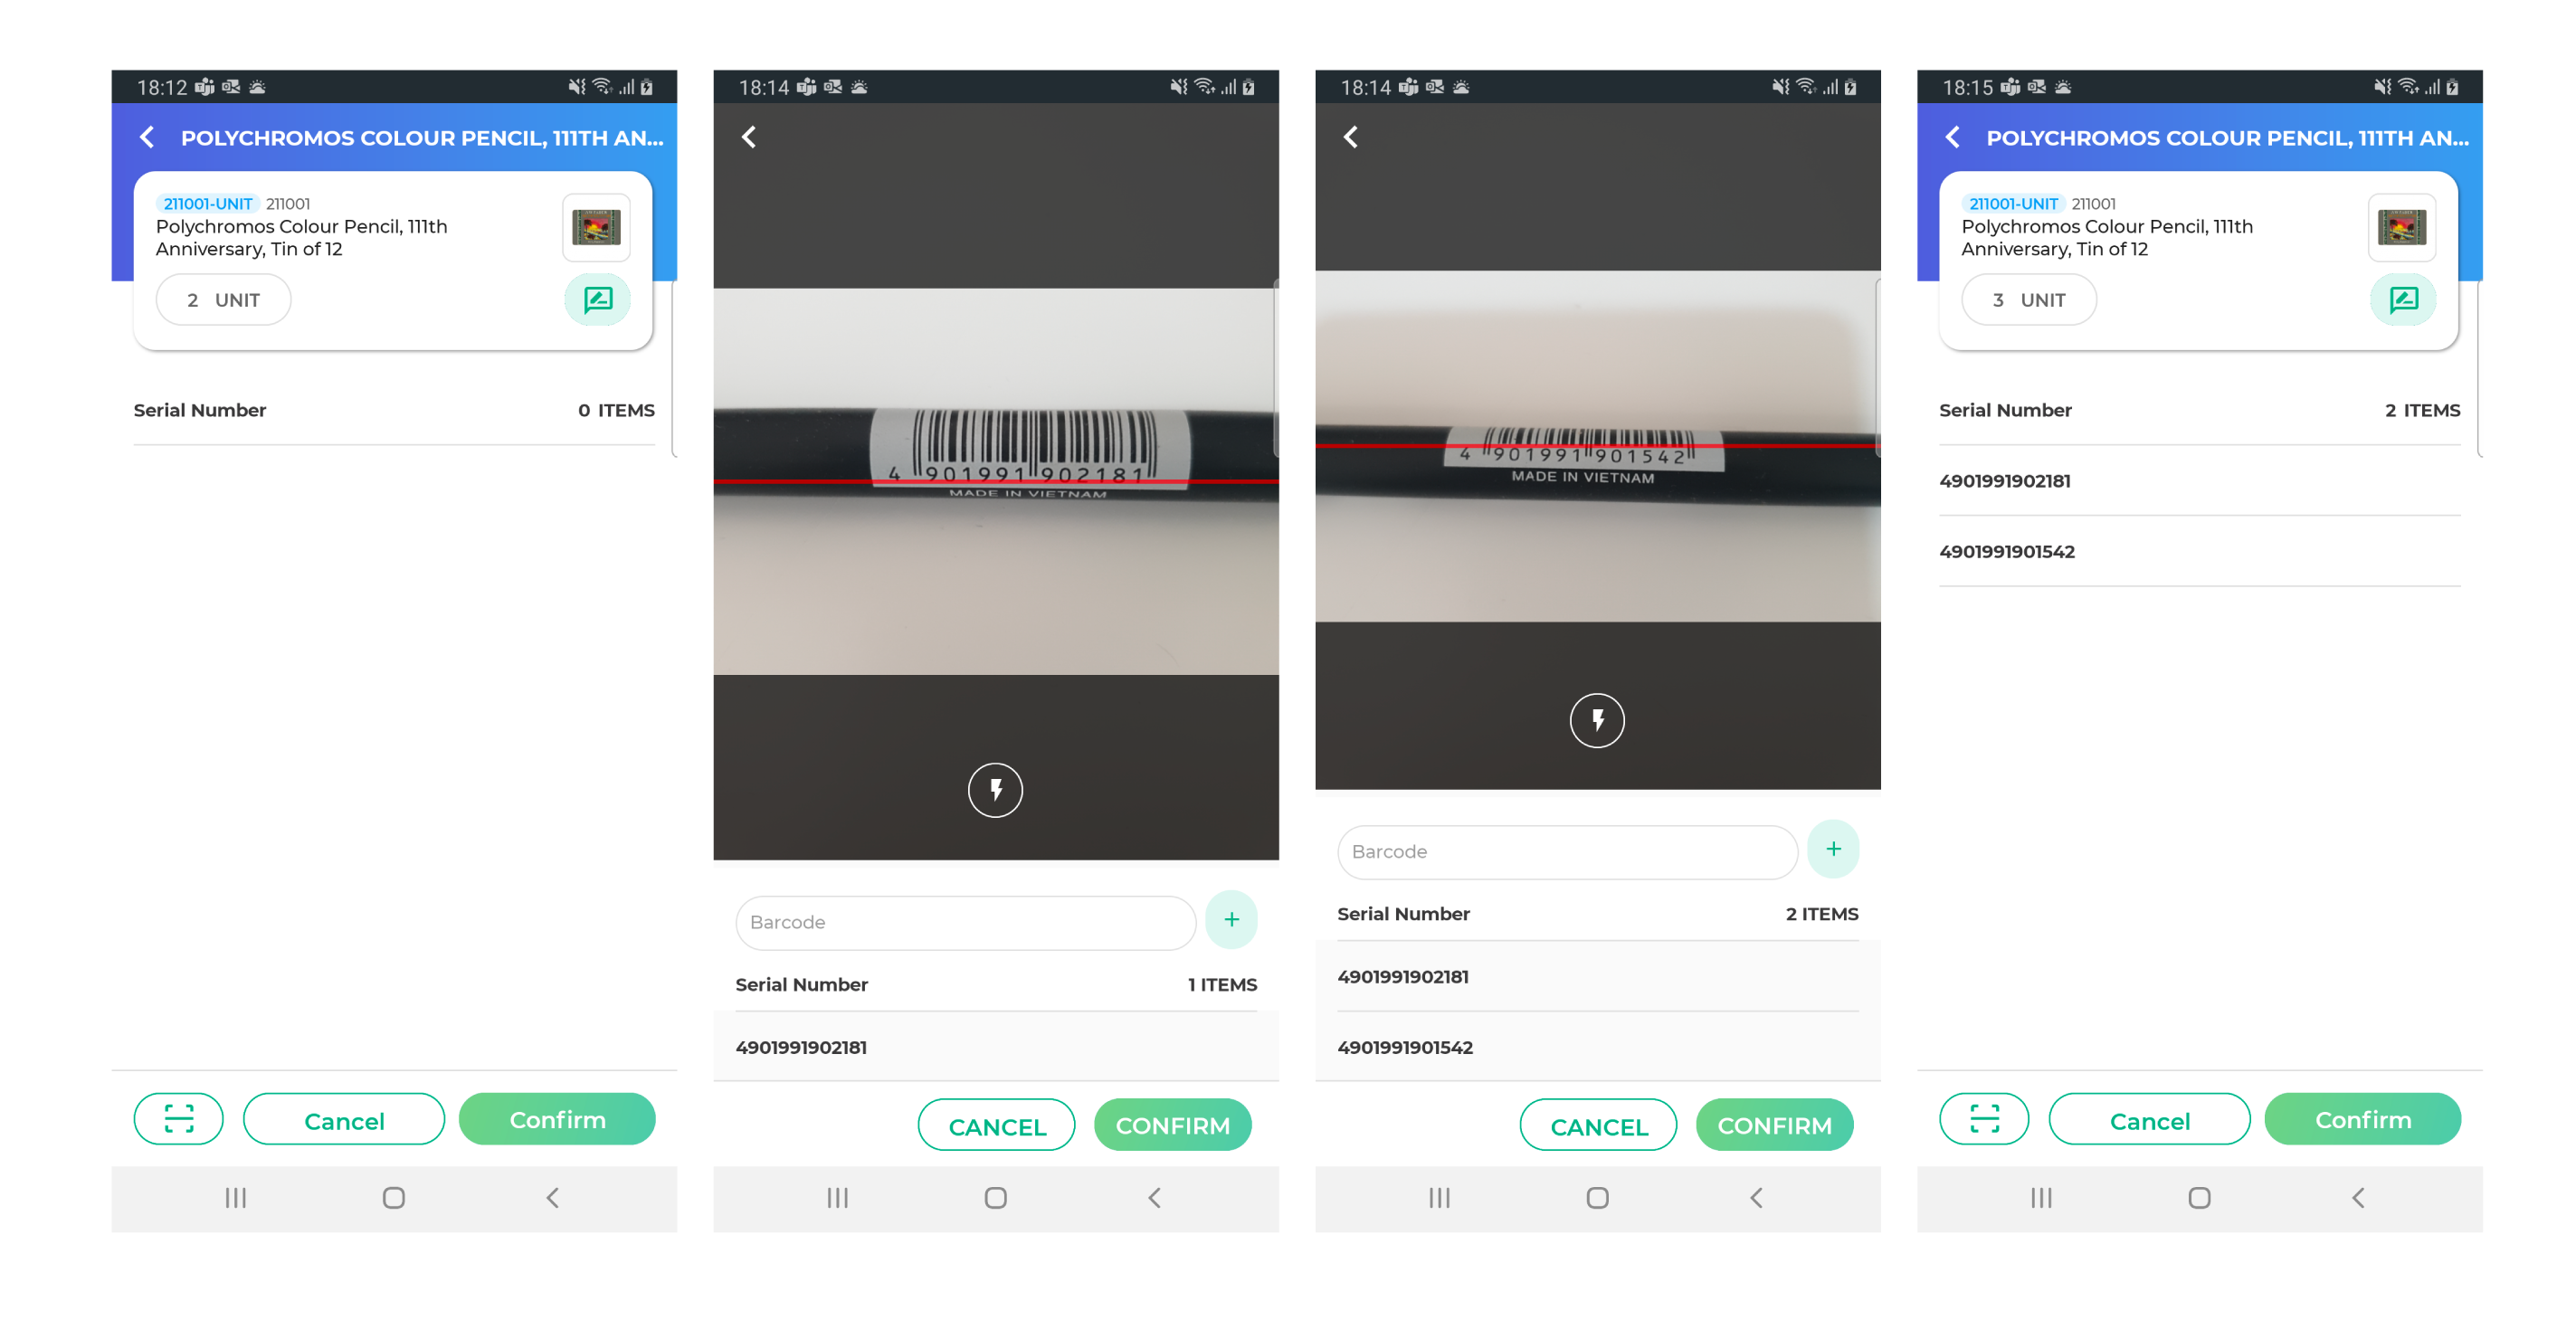
5. Click on the scan icon on the bottom left of the screen. Your camera function will be turned on.
6. Scan the serial number of the item and you should be able to see the number listed at the bottom panel as you do so.
7. You can also scan multiple serial numbers continuously. Once you've done so, click Confirm.
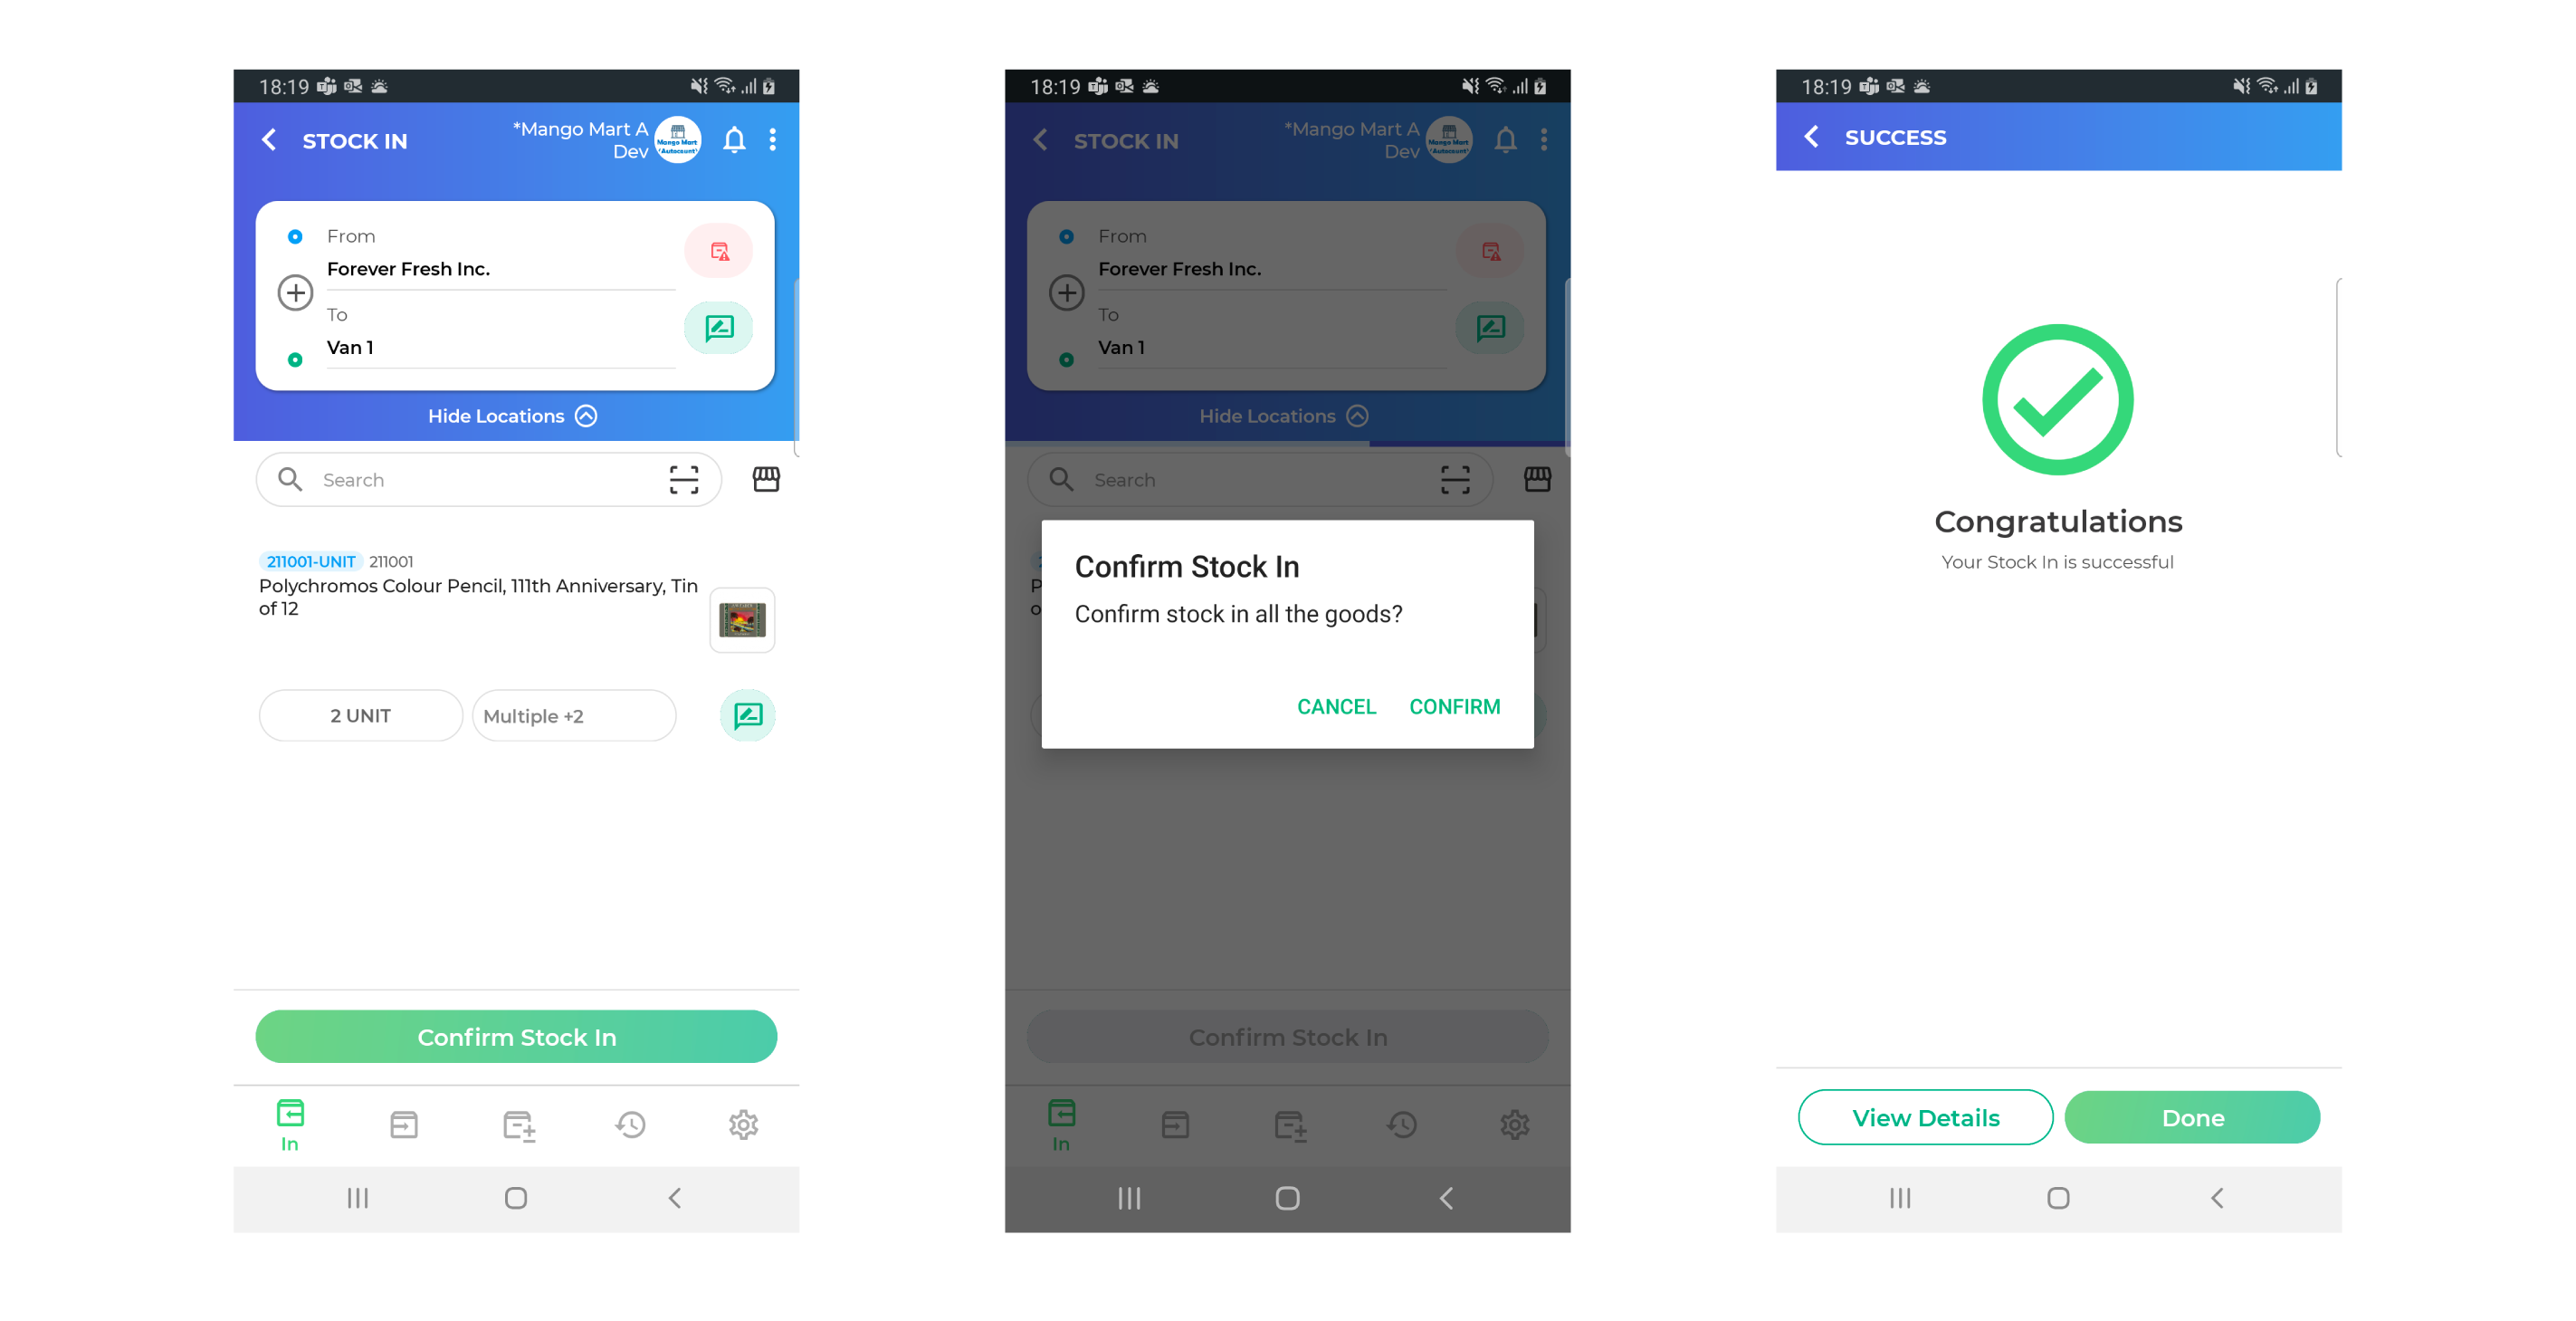
8. You will be redirected back to the main screen. Click Confirm Stock-In, follow the rest of the confirmation prompt until you see the success confirmation screen. Click Done.
¶ Deleting Serial Numbers
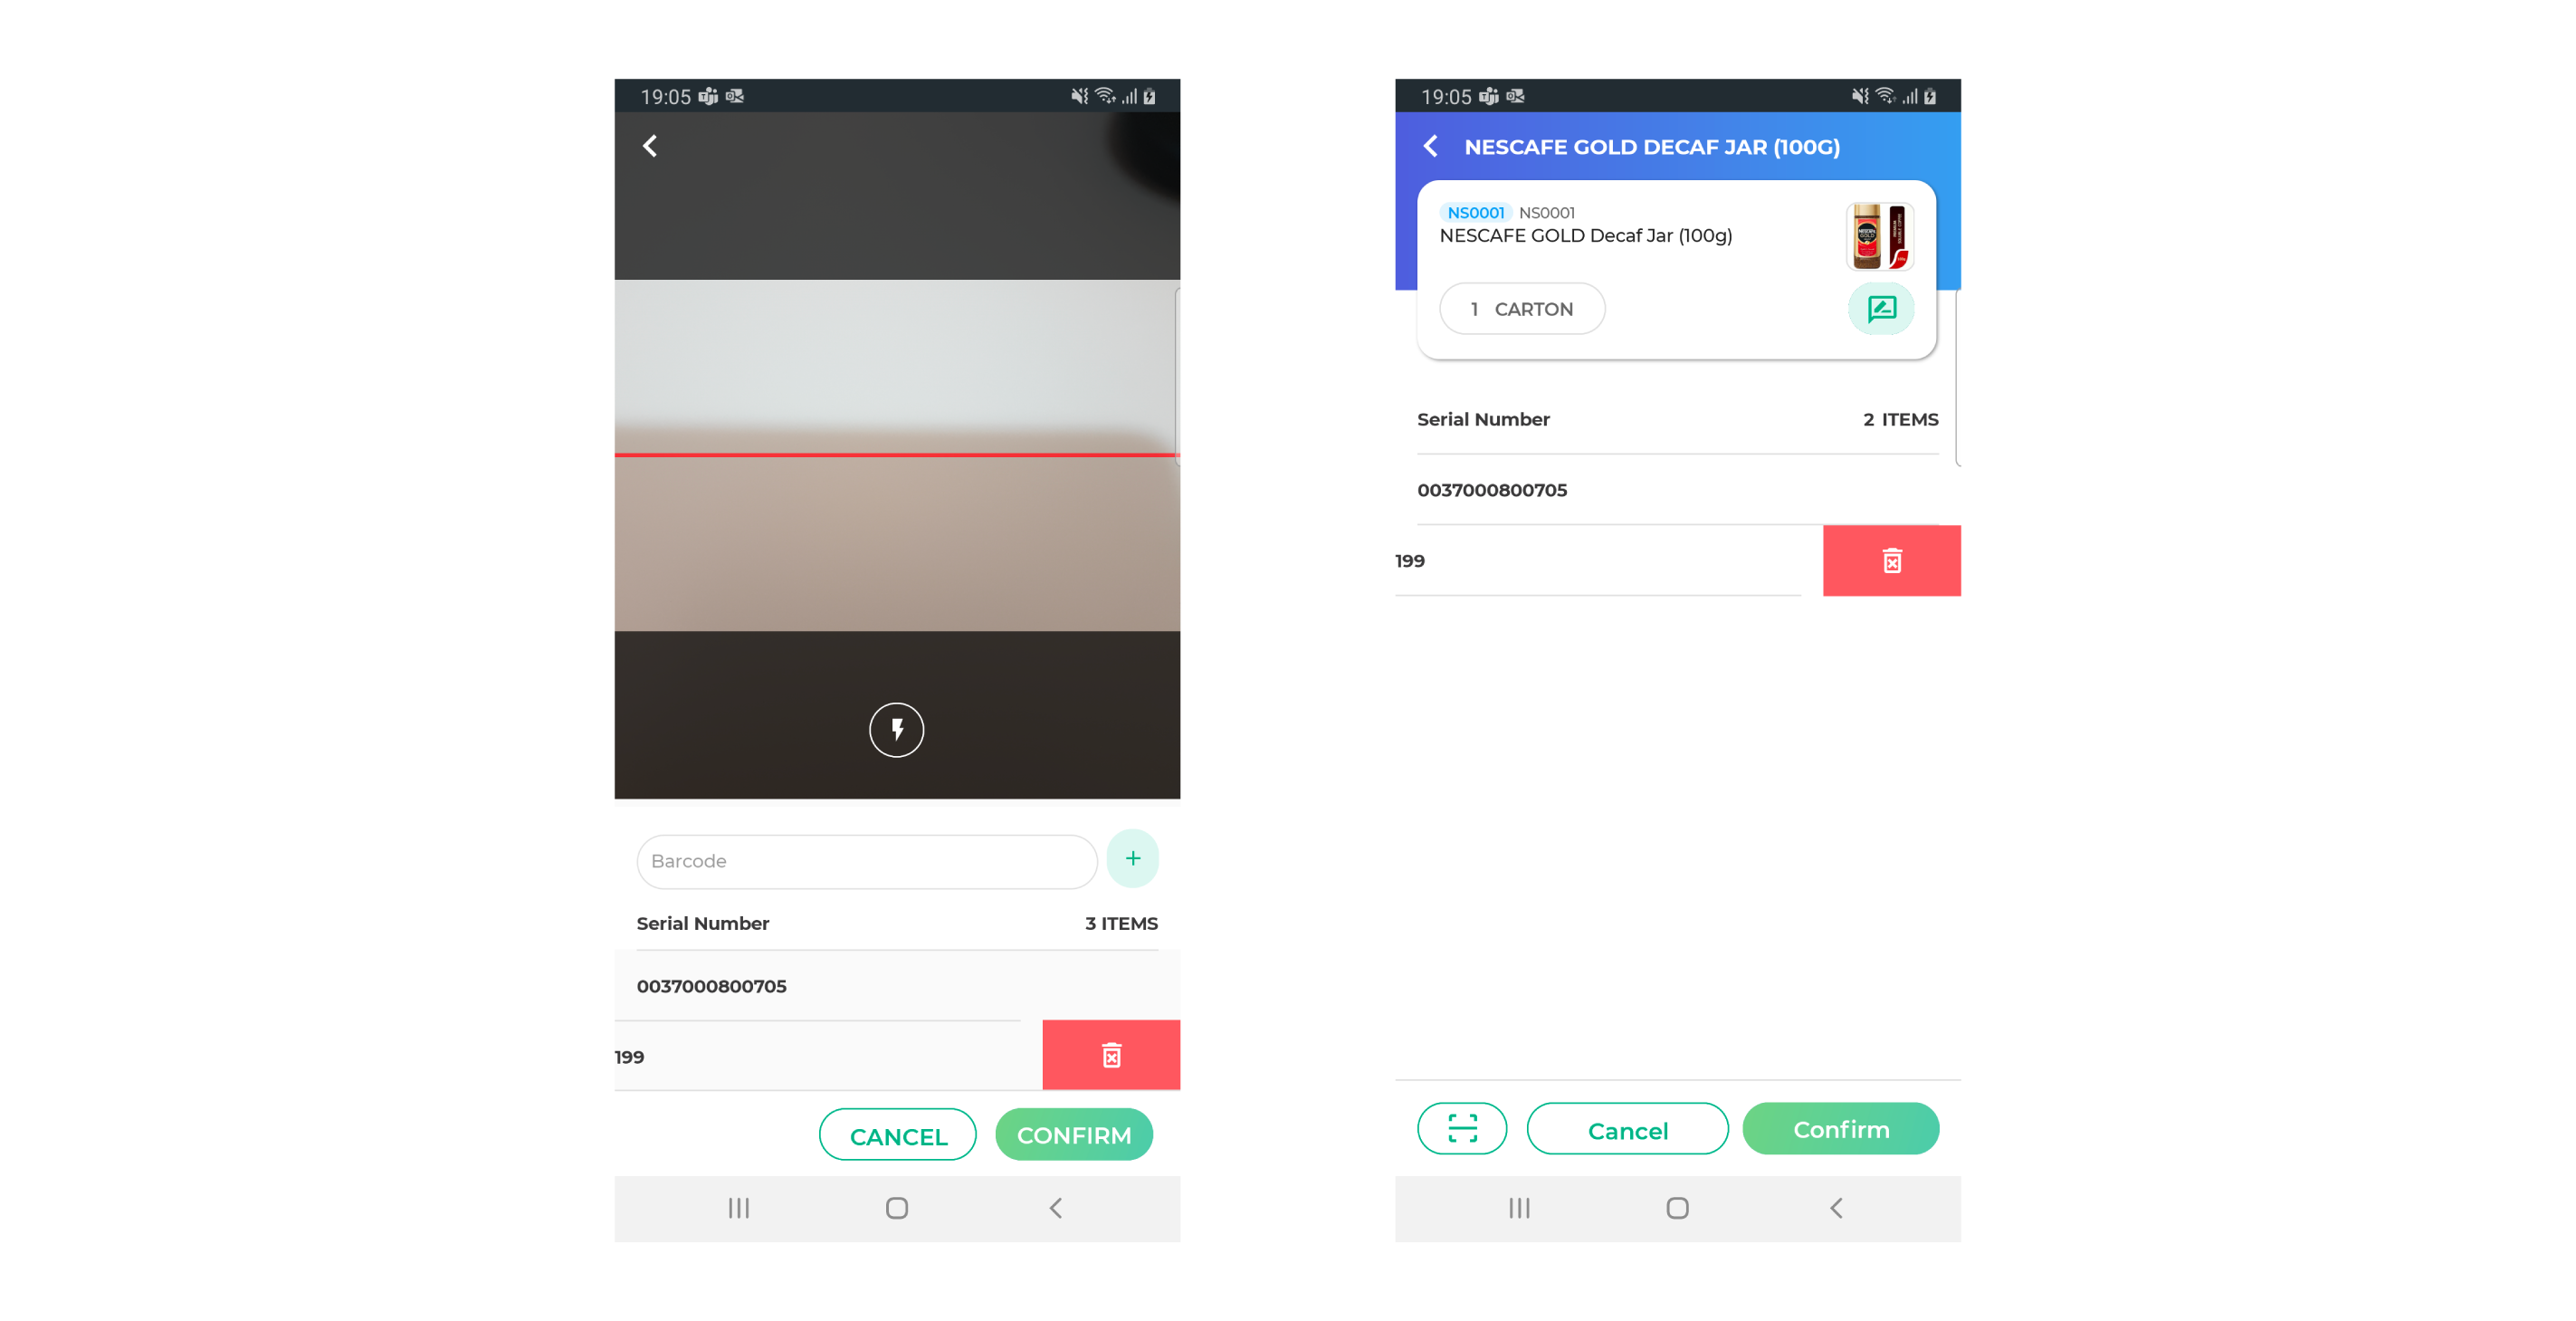
If you have scanned the wrong serial number, you can delete them using 2 ways:
1. In the scanning screen (with the camera on), and
2. In the Item summary screen, after you have clicked on Confirm in the scanning screen.
To delete, swipe left on the serial number that you would like to remove, and click on the delete icon on the right.
¶ View activity history
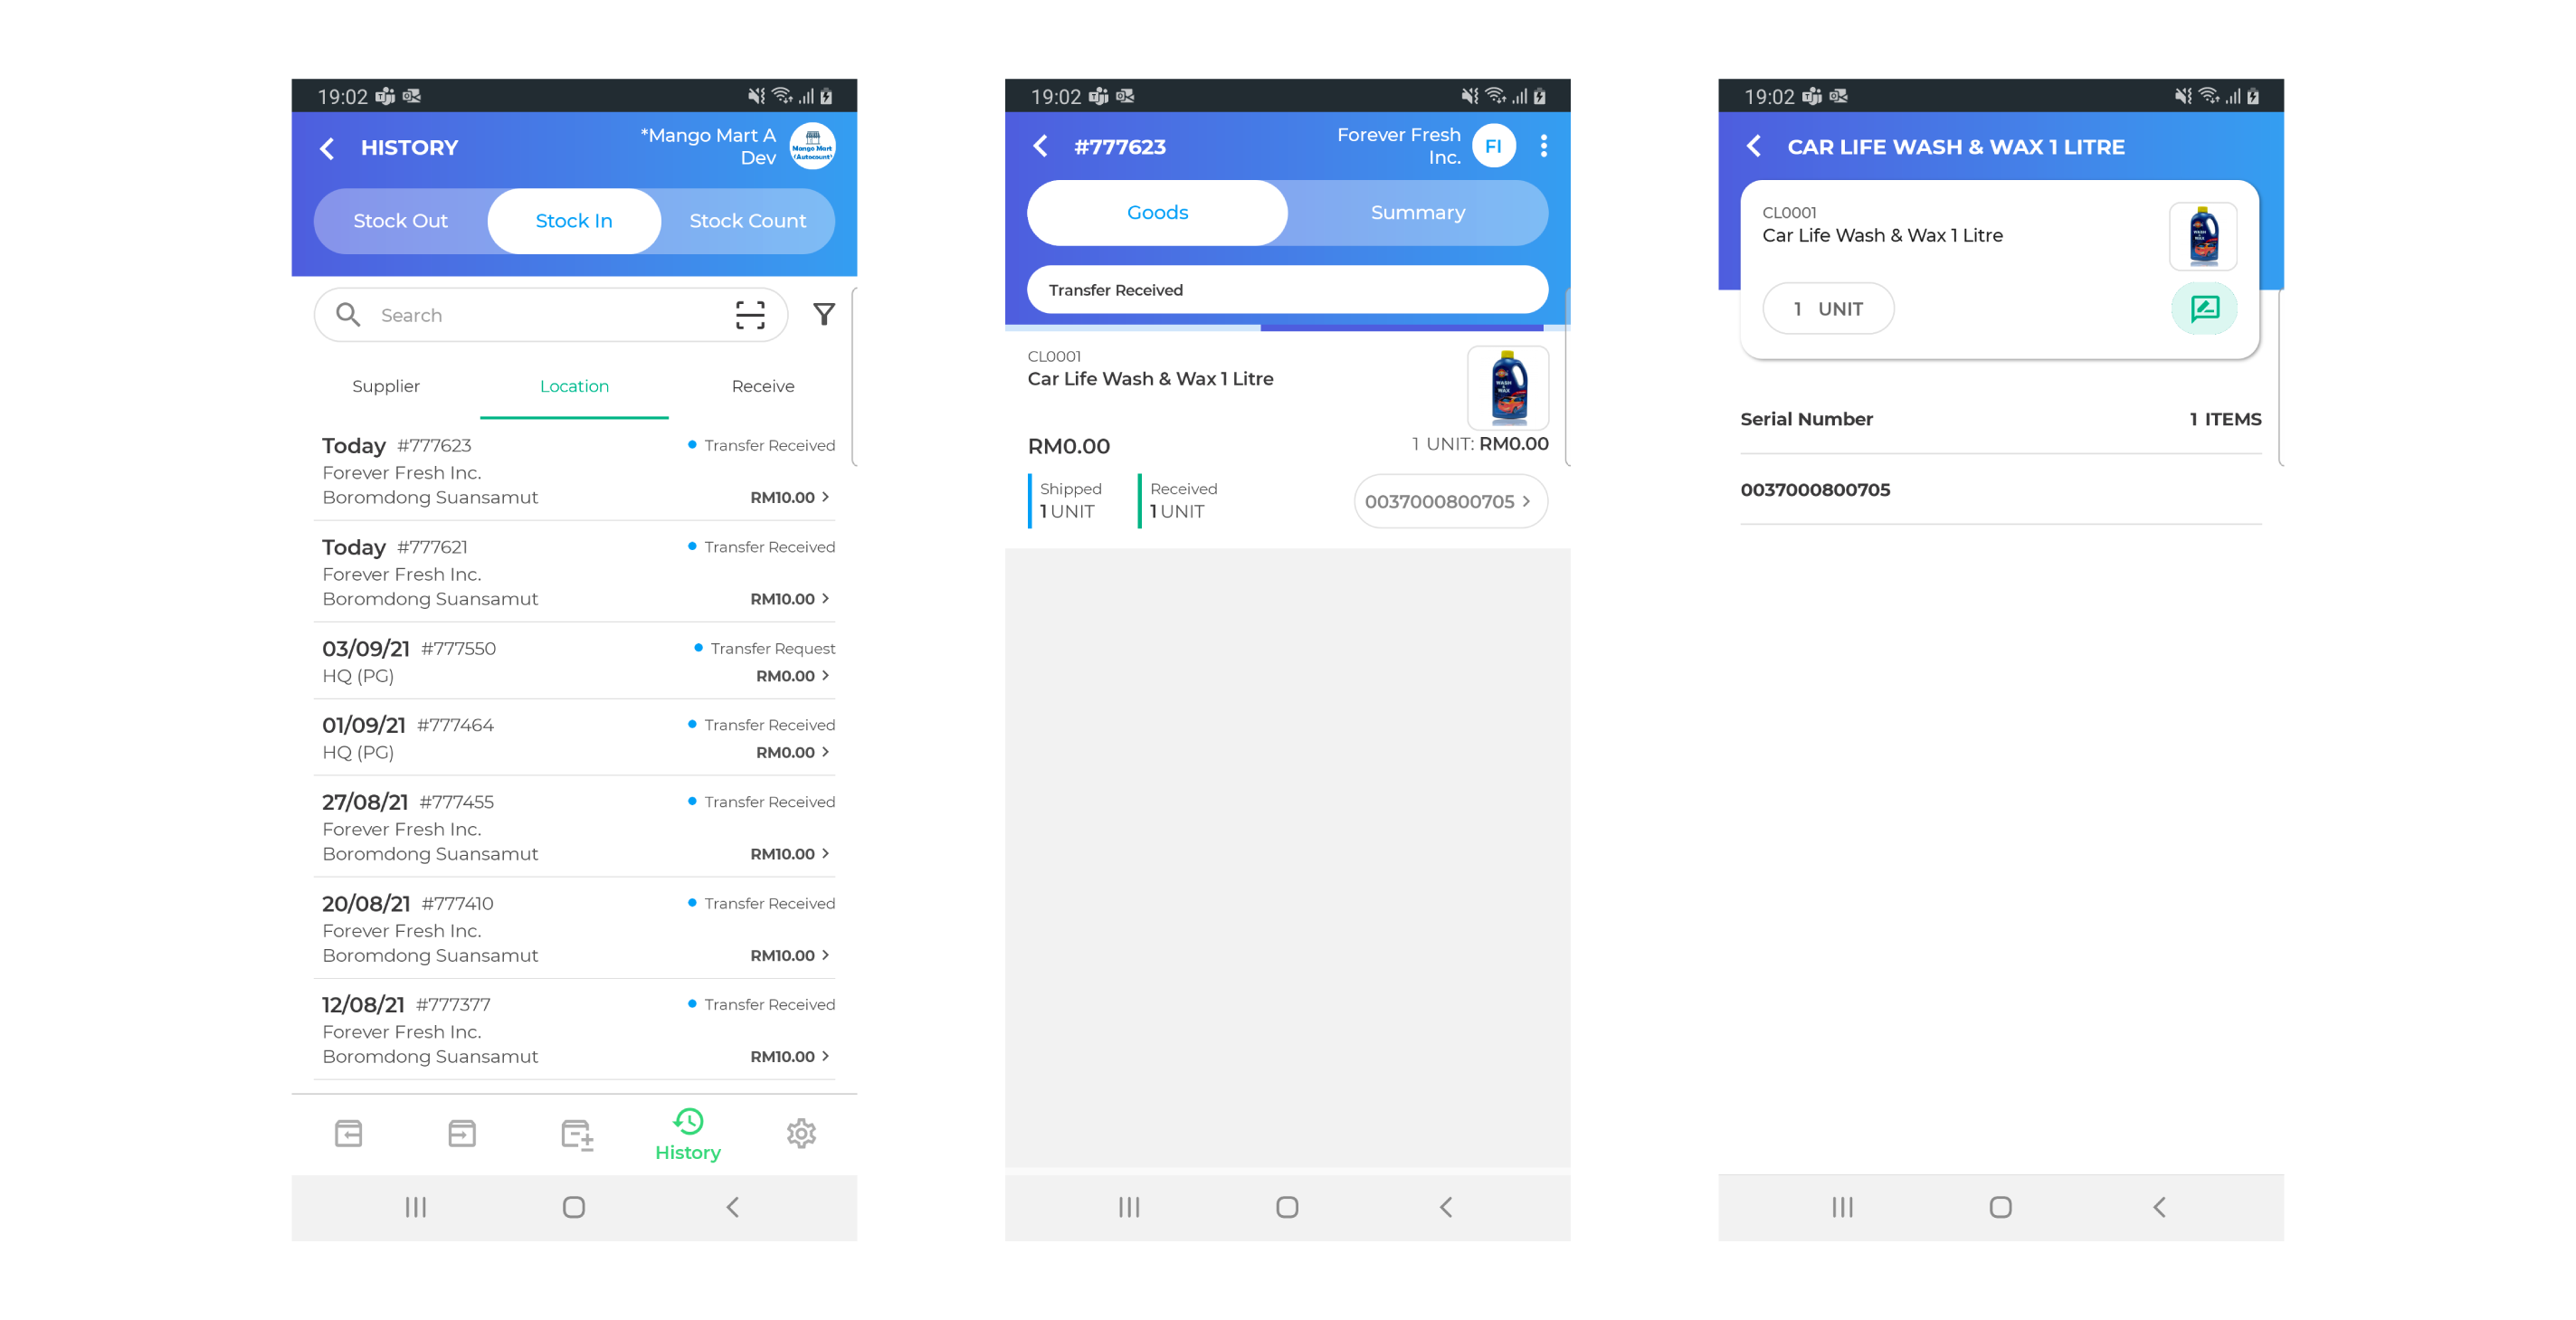
1. To view activity history, click on the History icon on the bottom tab.
2. Select a document from the list accordingly, and you will be redirected to the document screen itself.
3. To view the list of serial number(s), click on the serial number tab located below the product image.
