¶ Tabs Overview
1. Click on BO Rep to launch the app.
2. Choose a supplier in the Suppliers page.
3. By default, you will land on the first tab - To Do.
4. There are 6 main tabs in BO Rep:
- To Do
- Catalog
- Tasks
- Customers
- All Customer History
- Settings
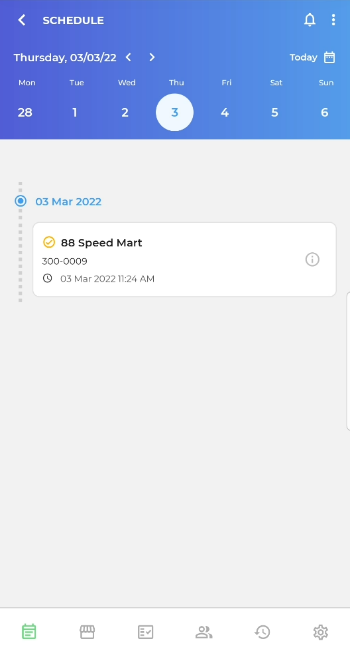
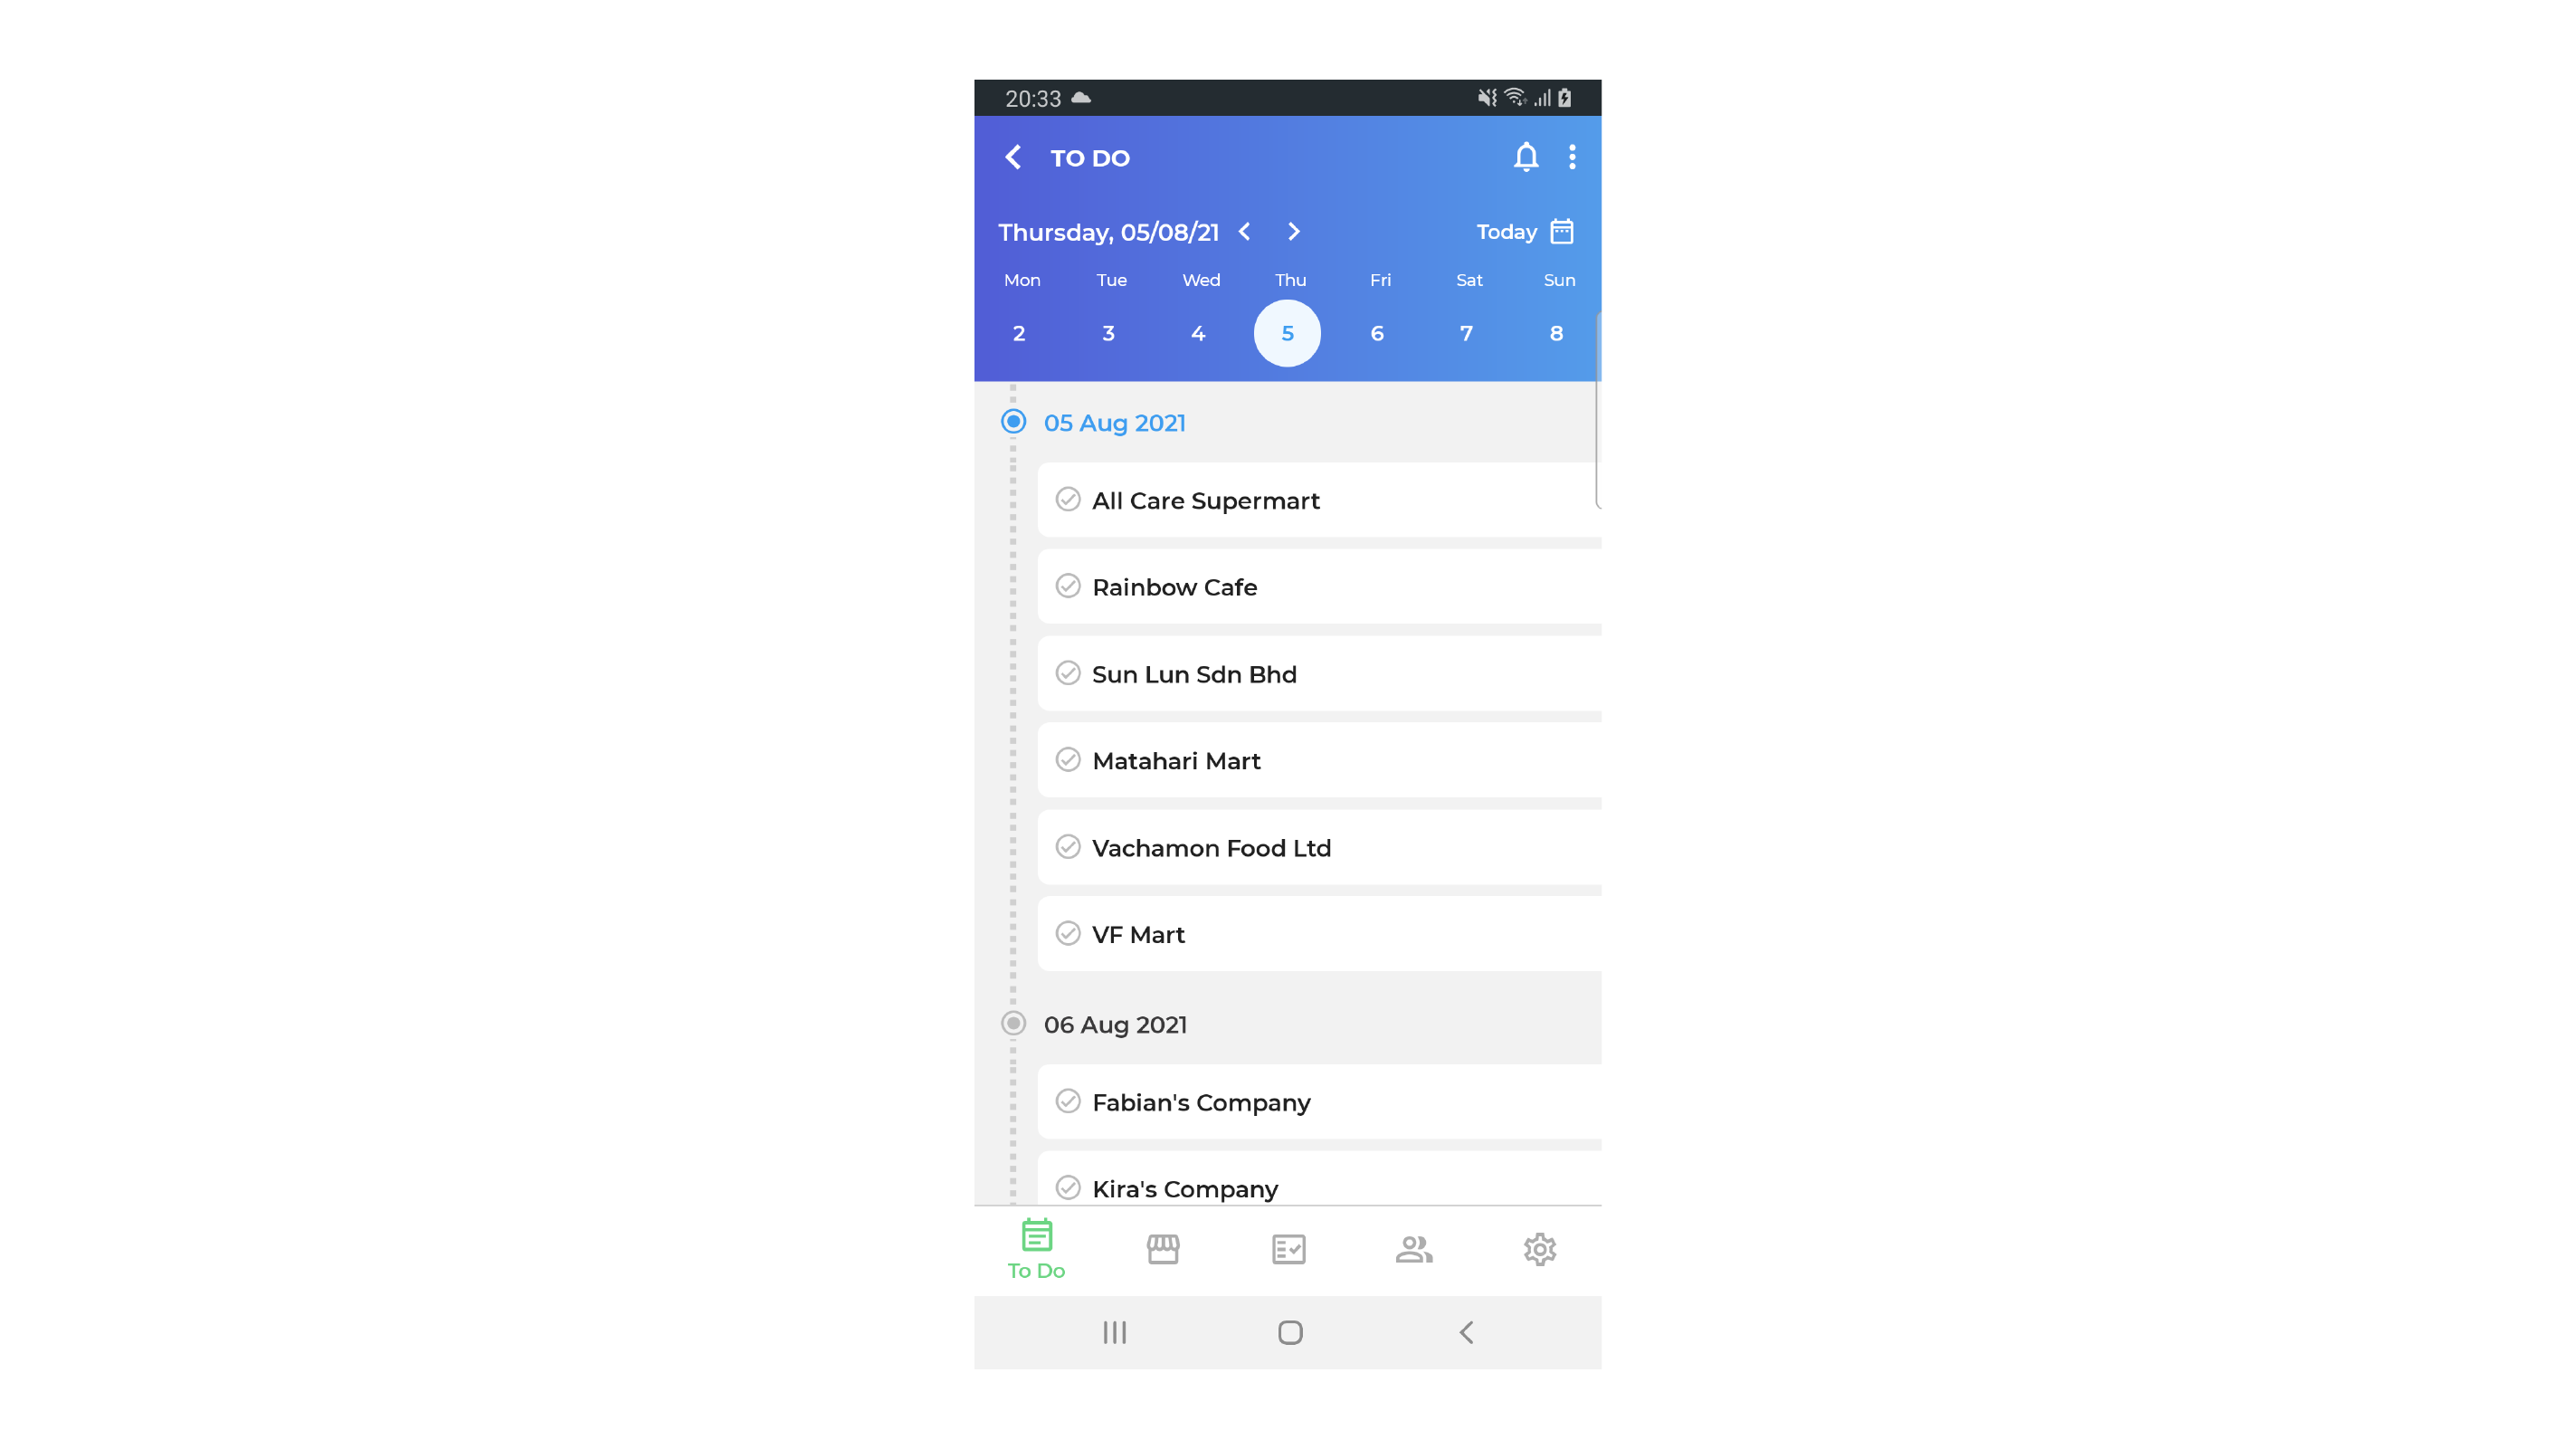
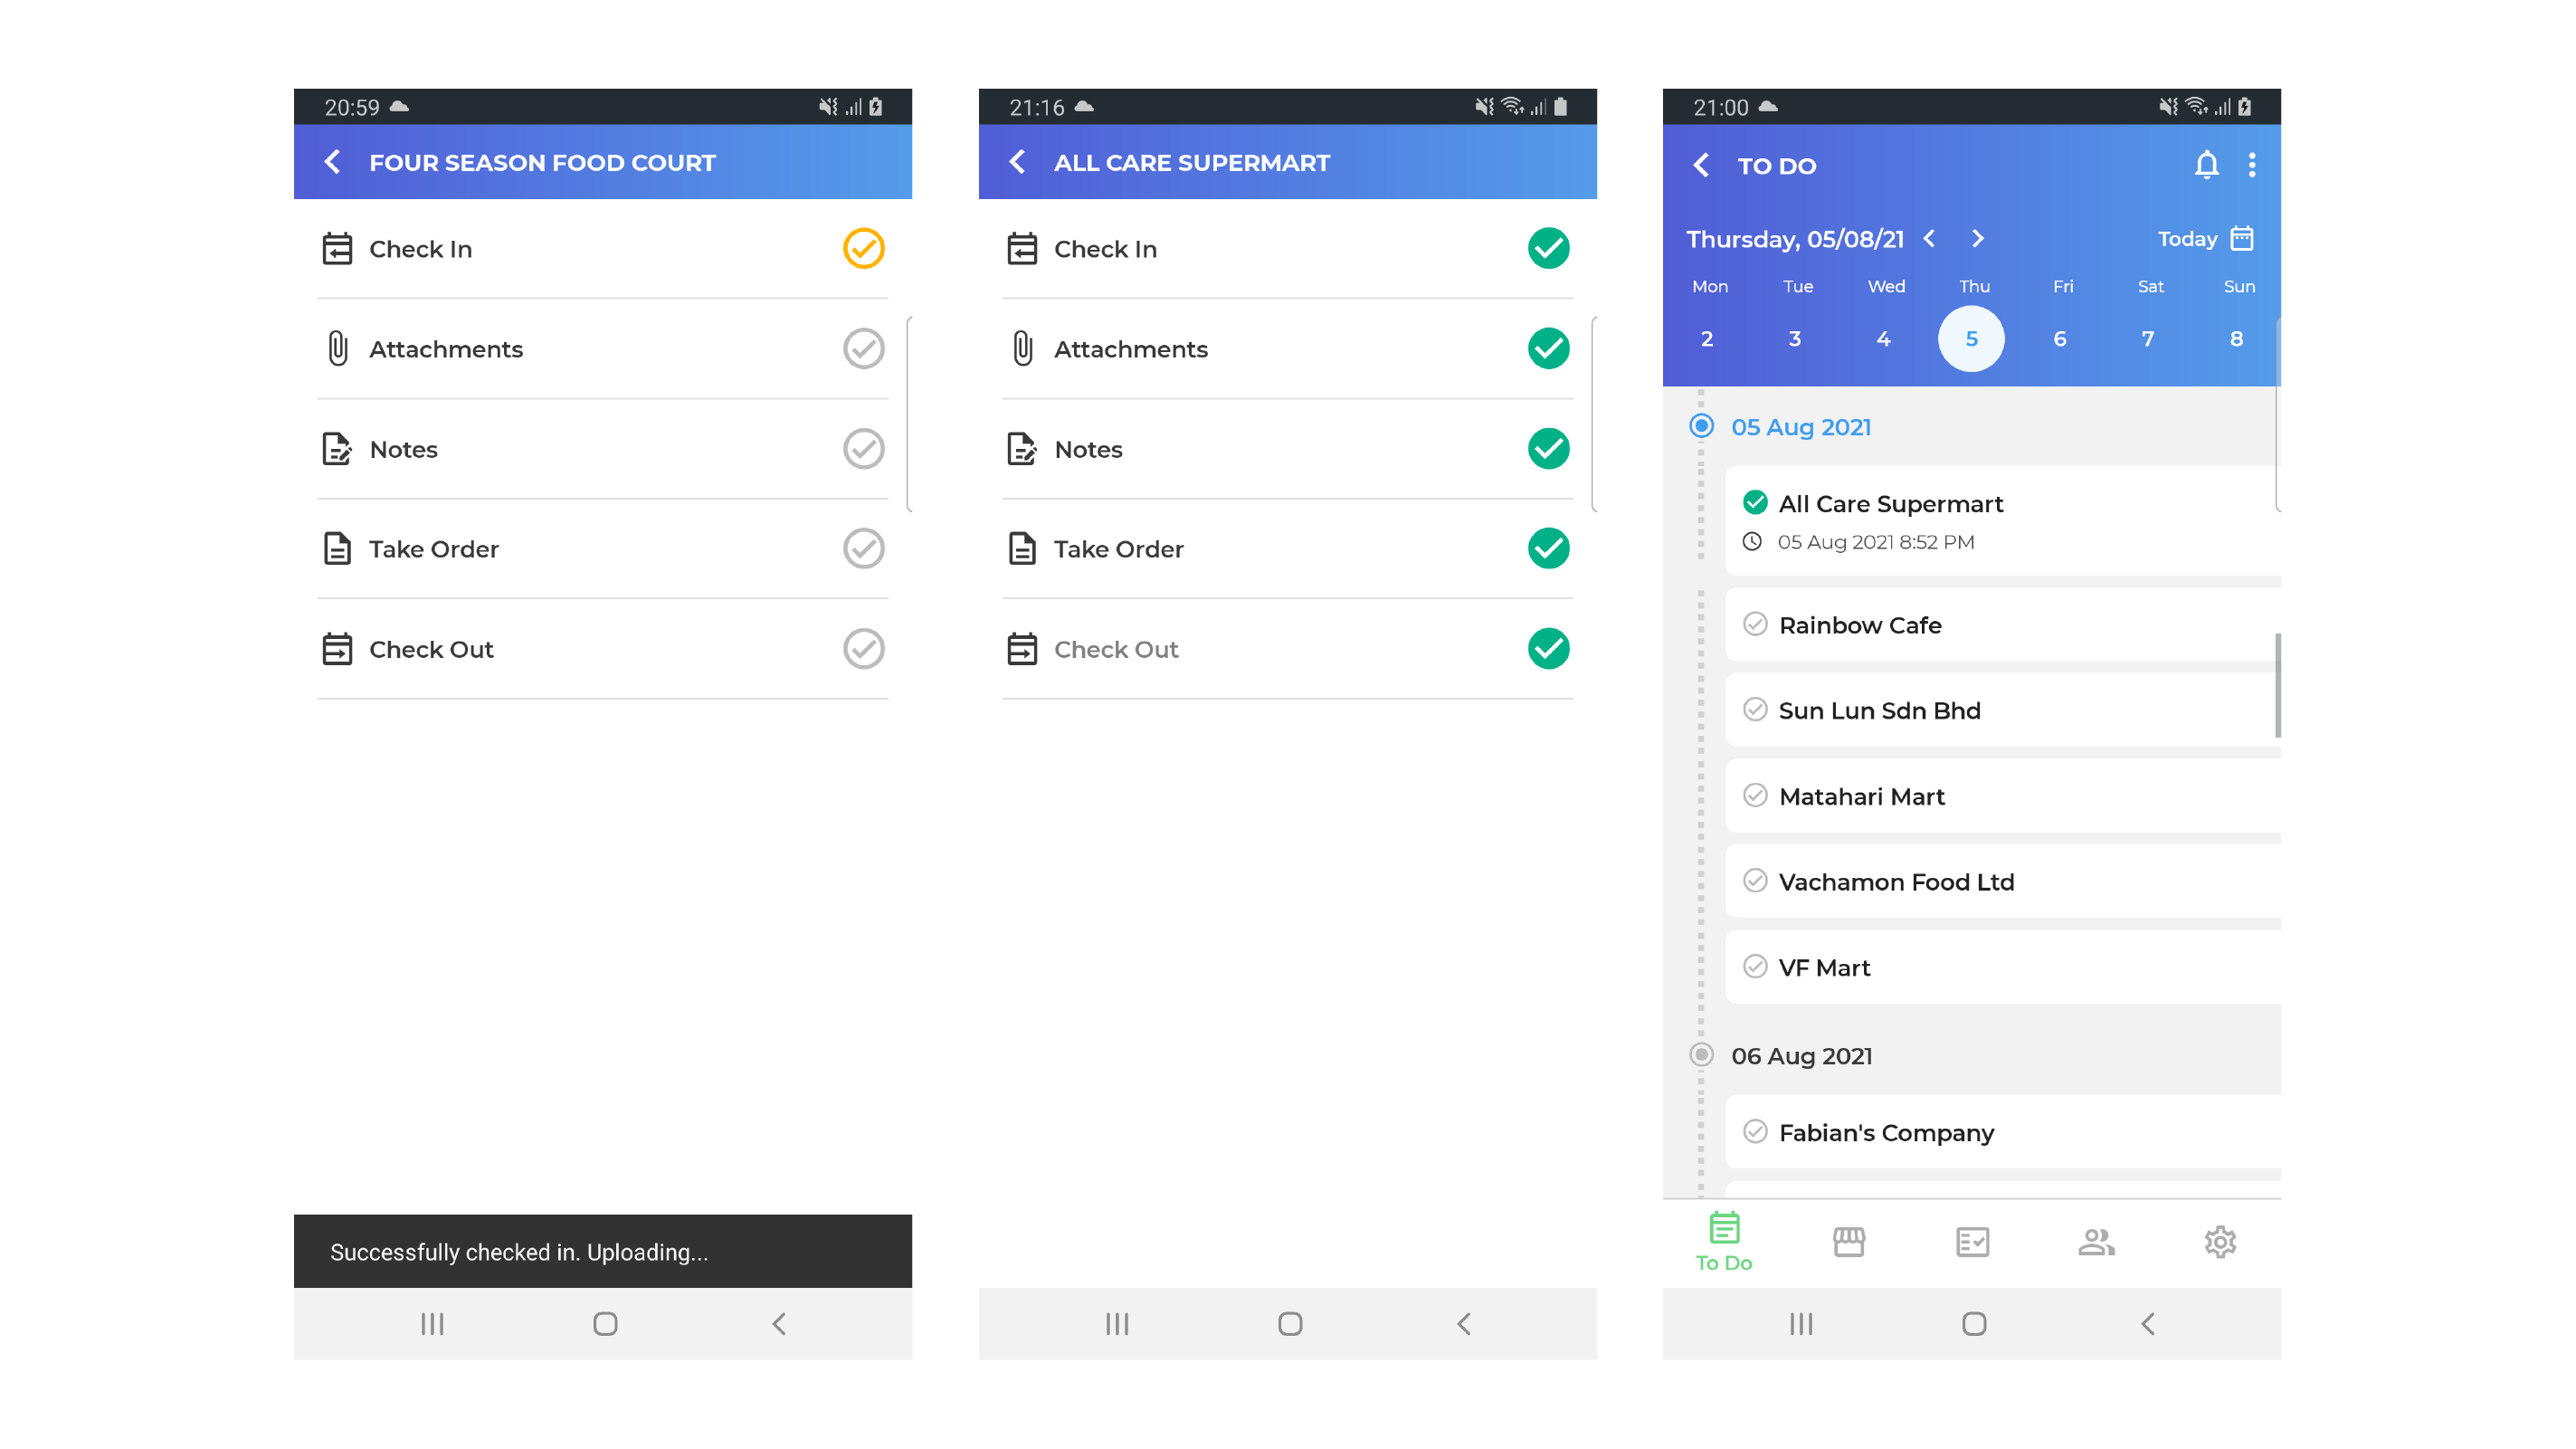
¶ To Do
The To Do tab shows you a list of planned activities or tasks that the user is required to execute.
The user is also able to navigate through the other days of the week by clicking on the dates on the top of the page.
To navigate by weeks click on the left or right arrow icons next to the date.
Click on Today to quickly return to the day itself.
¶ Perform tasks
To perform tasks, click on the customer. You will be redirected to a tasks page with a list of different actions.
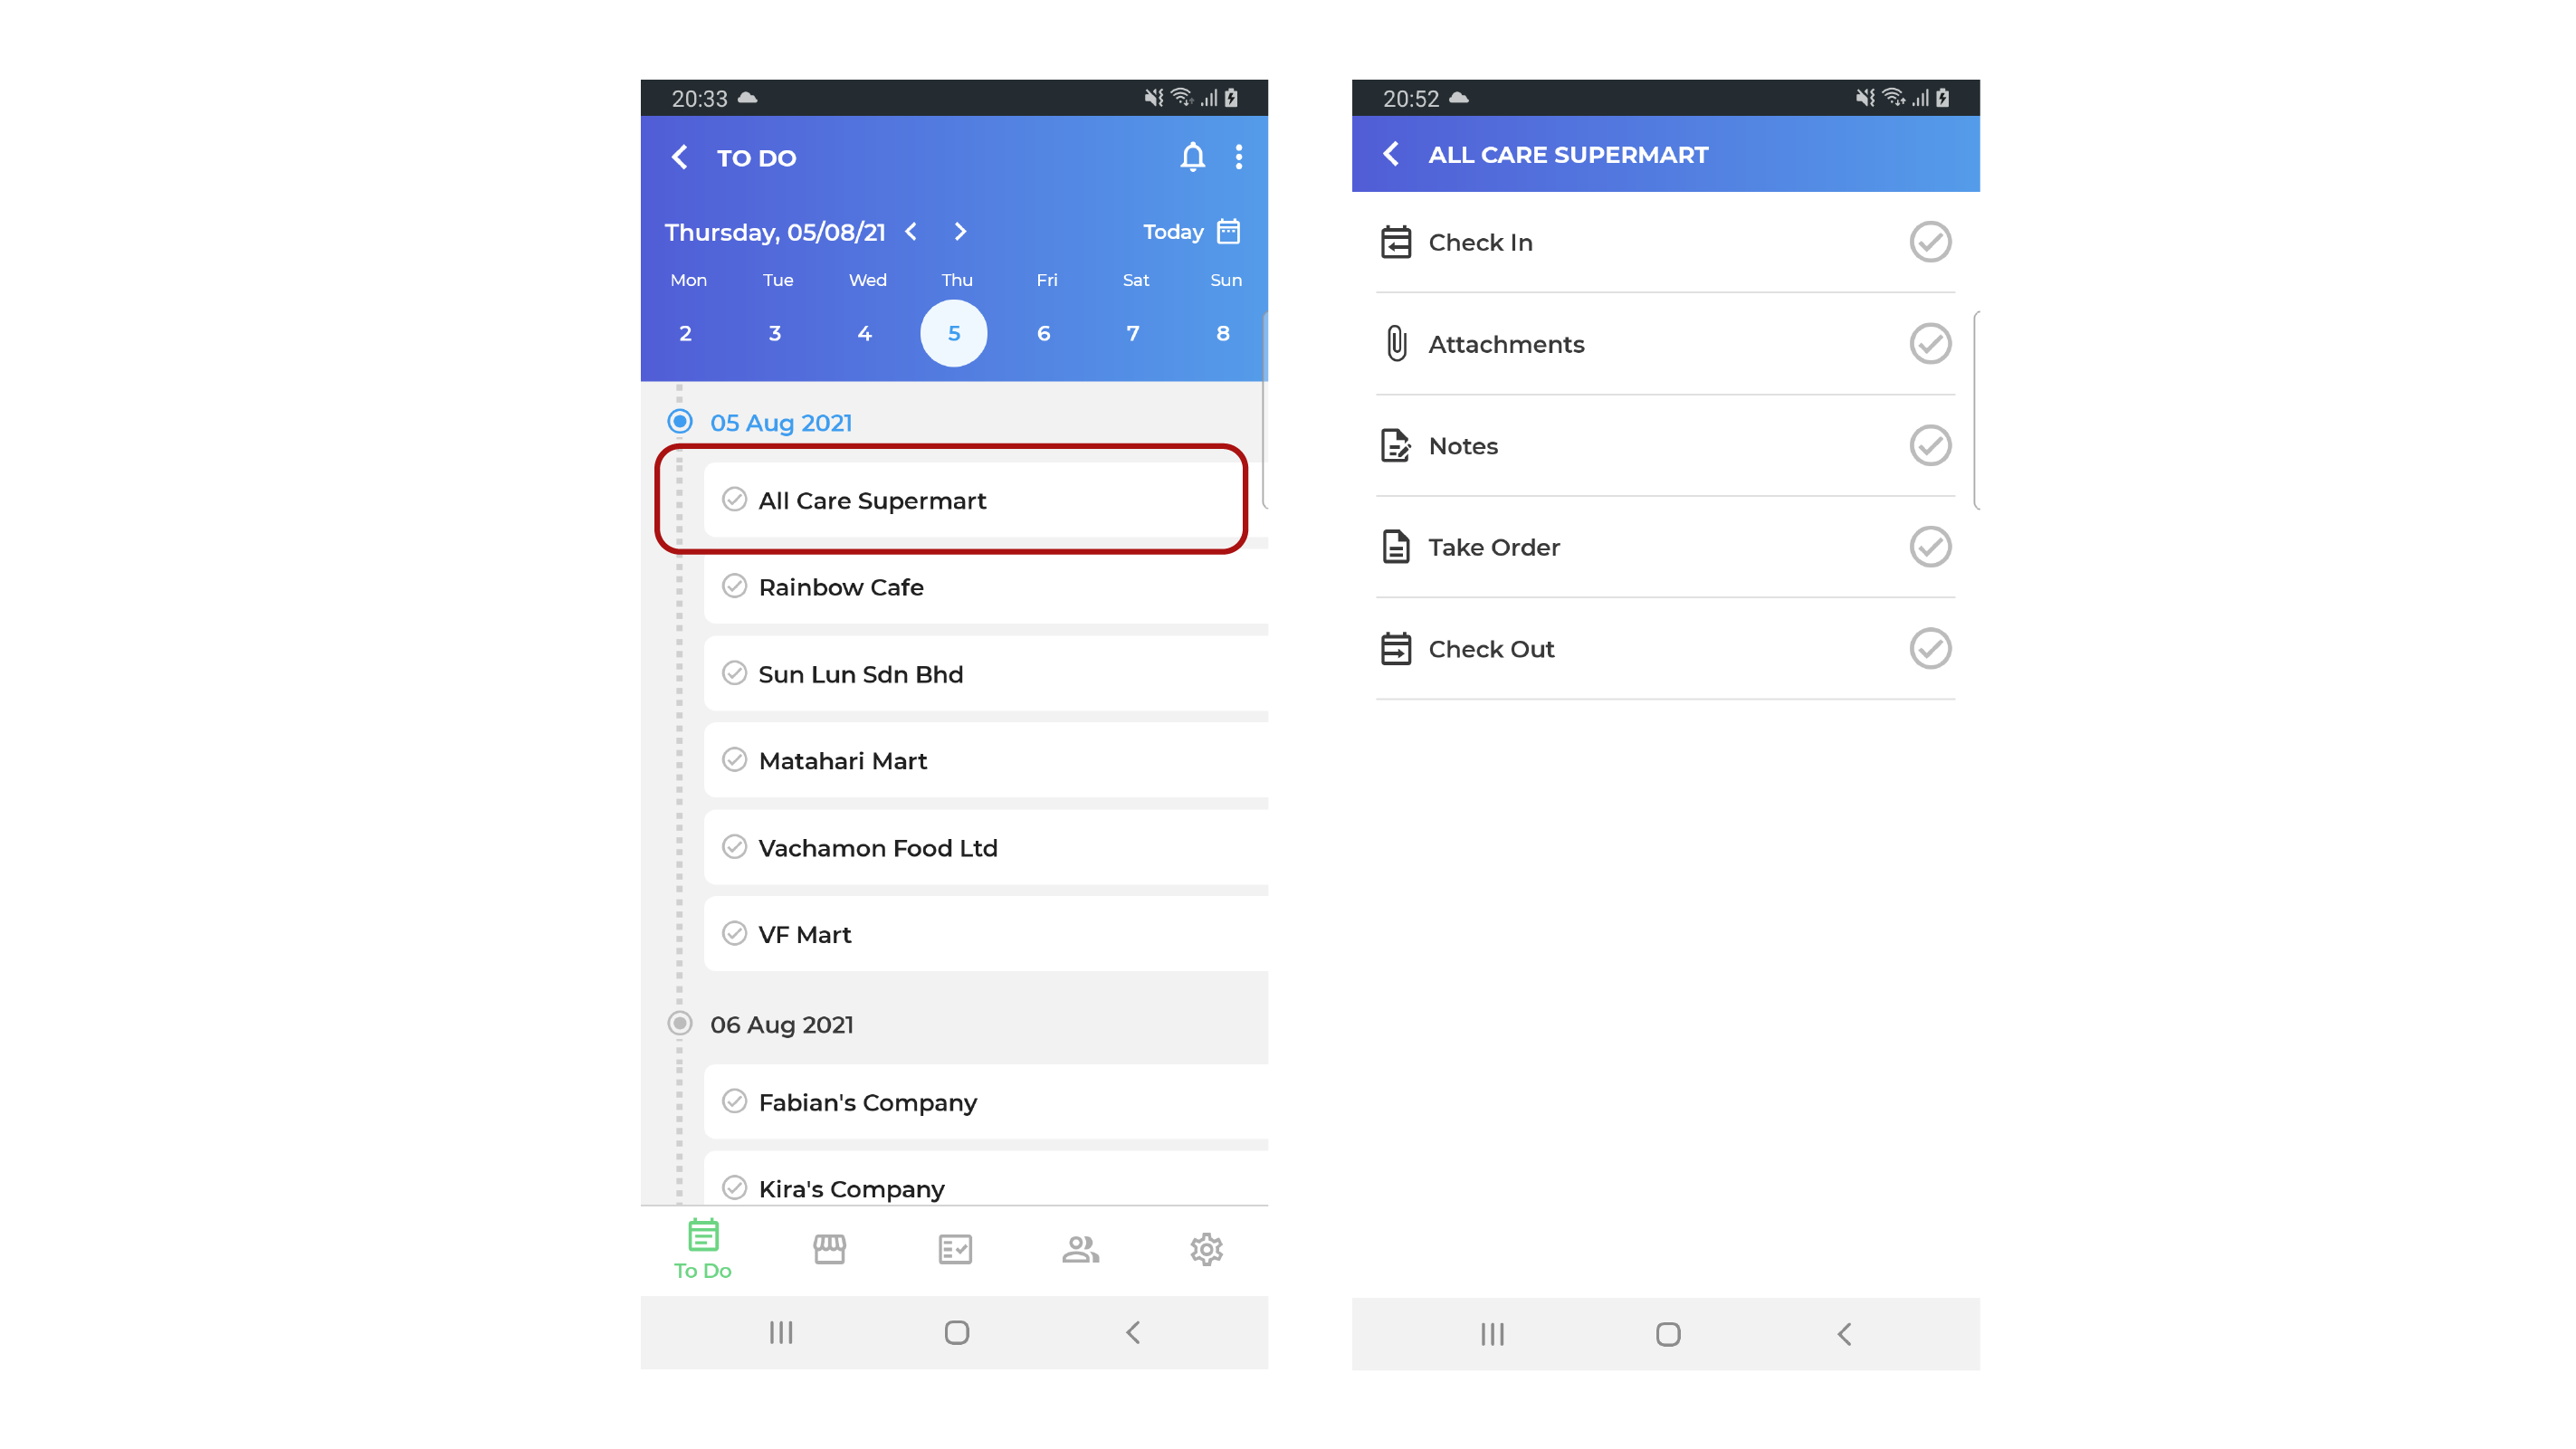
You can then perform each action by clicking into it. The check mark will turn green for every completed action.
When a check mark turns yellow, it means that there is poor internet connectivity, hence the action is not able to be uploaded successfully. You may try to refresh your internet connection, and it will automatically turn green once reconnected to the internet.
Once all the actions are completed, click back and you will see a green check mark next to the customer, together with a time log below it.
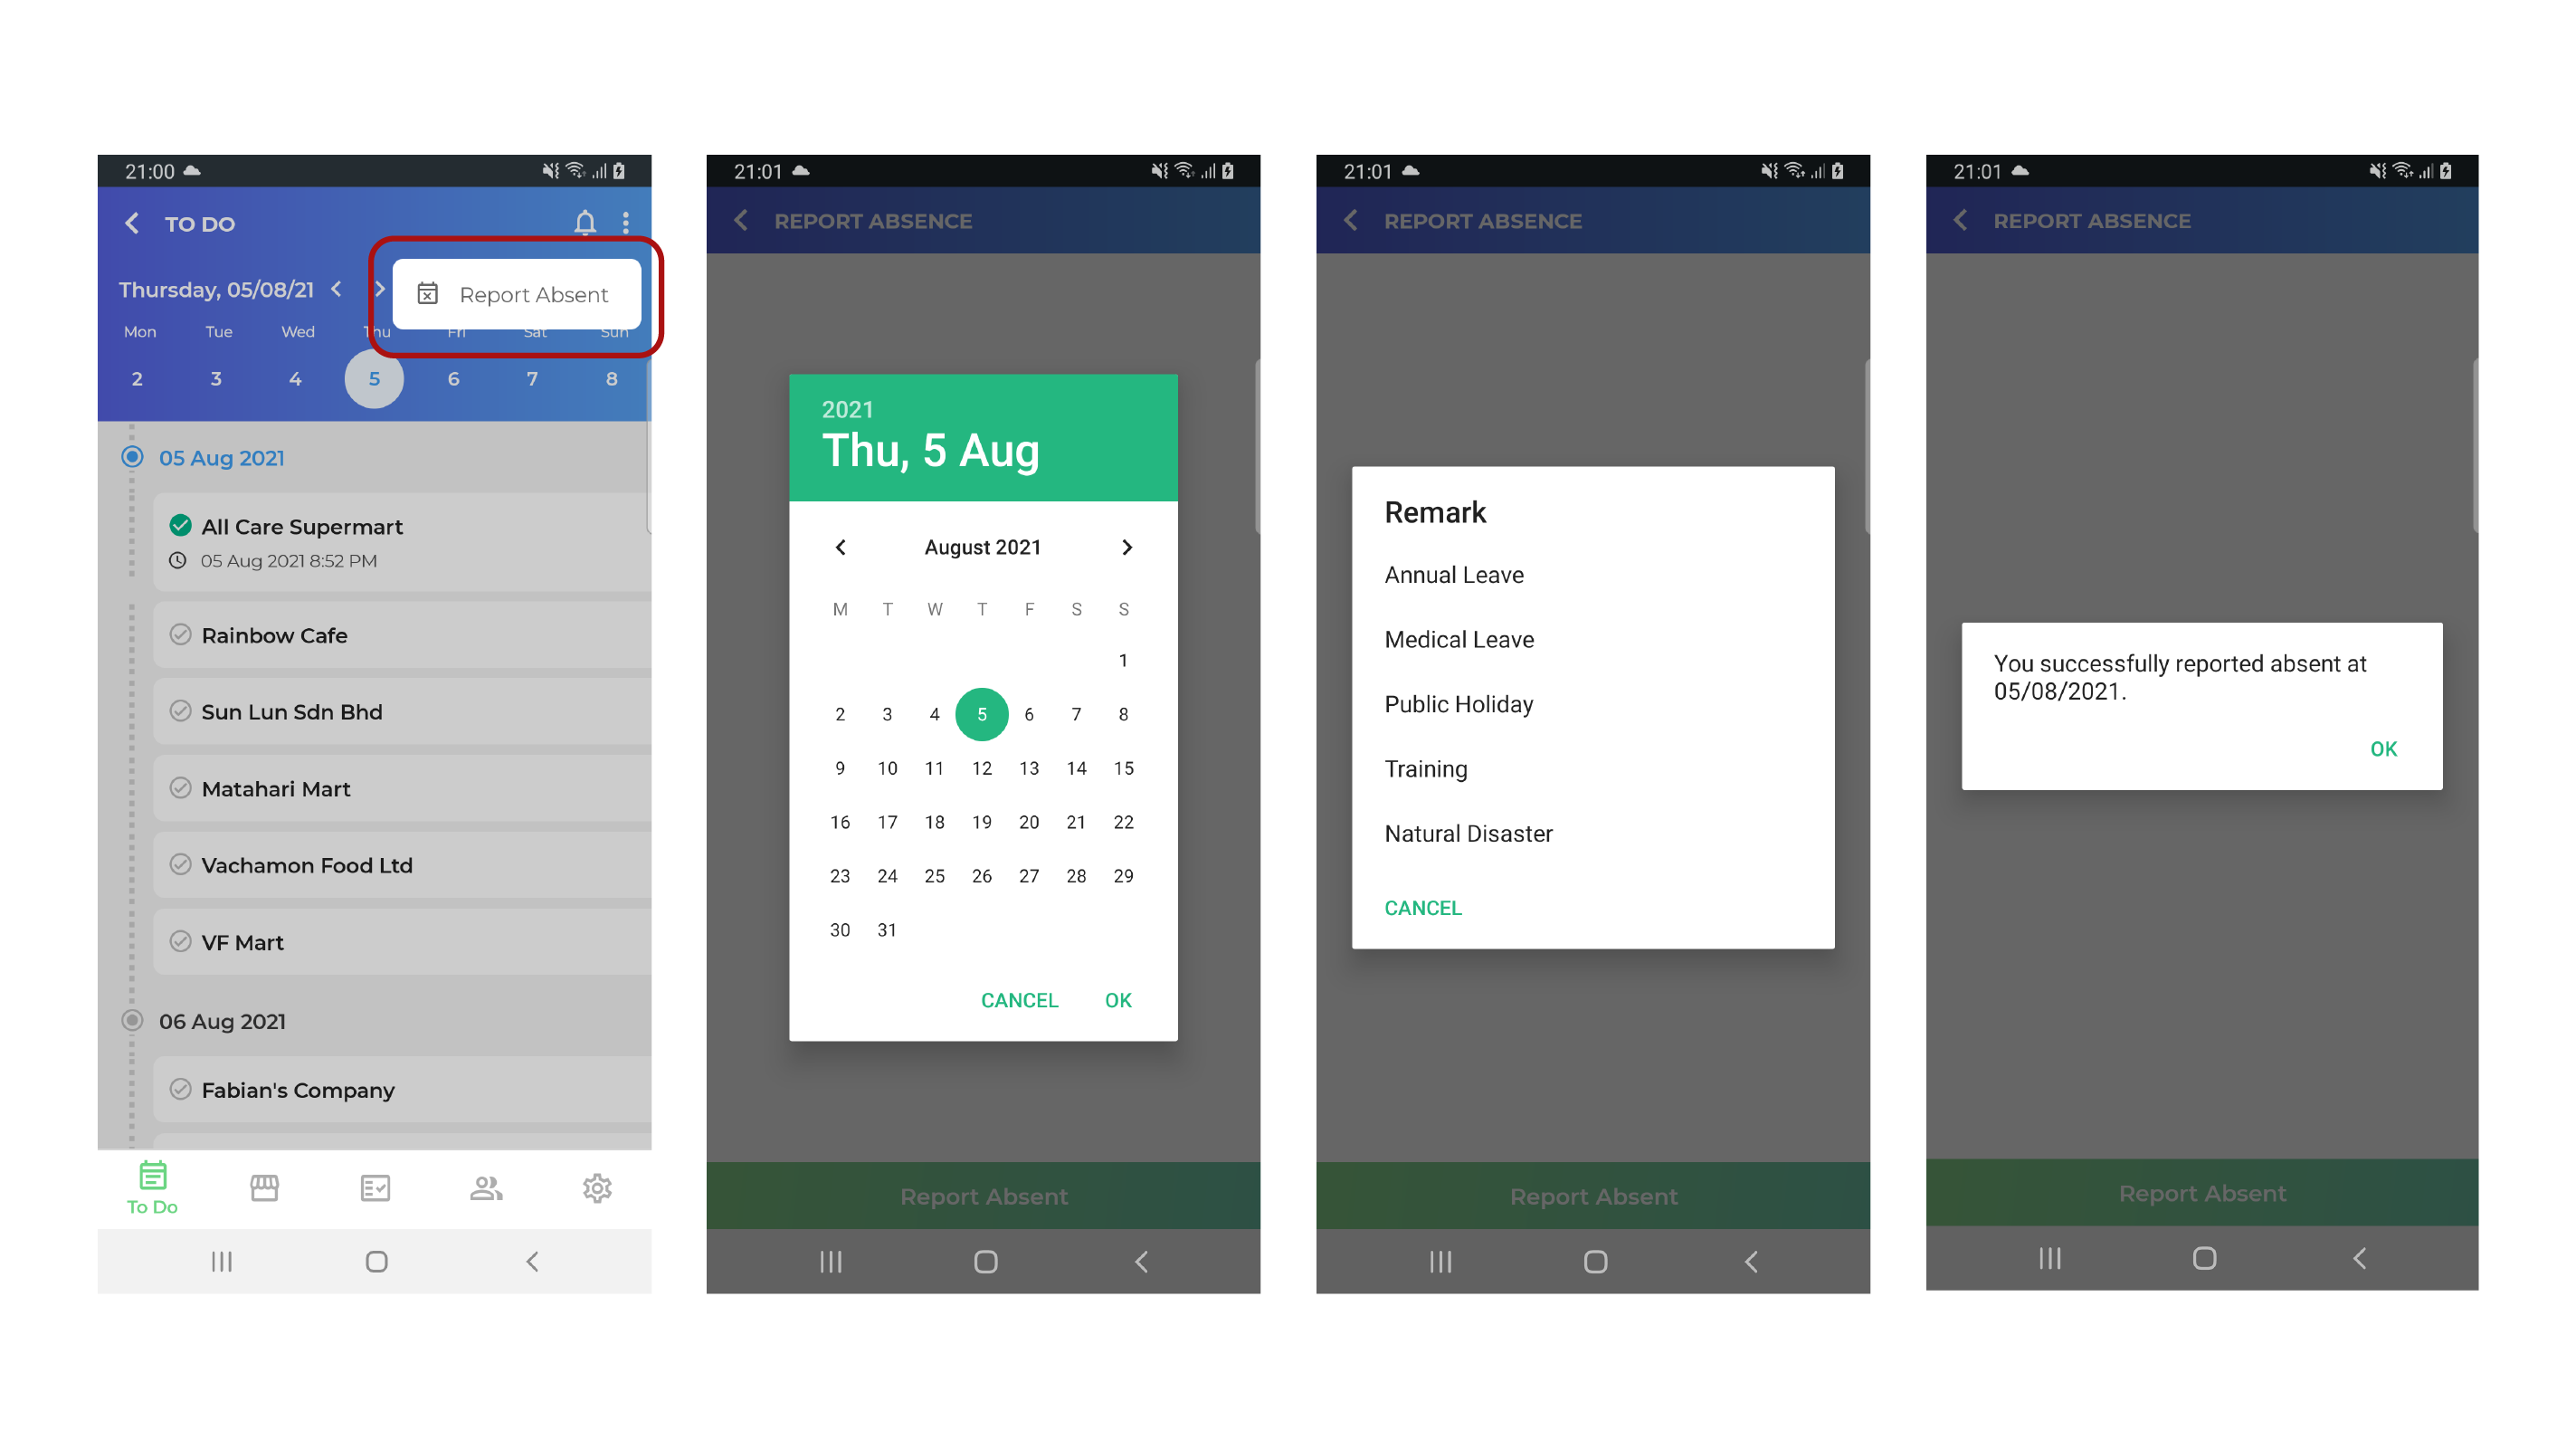
¶ Report Absence
You can report absence by clicking on the 3 dots menu icon on the top right of the screen, and click on Report Absent.
Follow the steps and you will get a success pop up window once you've successfully reported. Click OK.
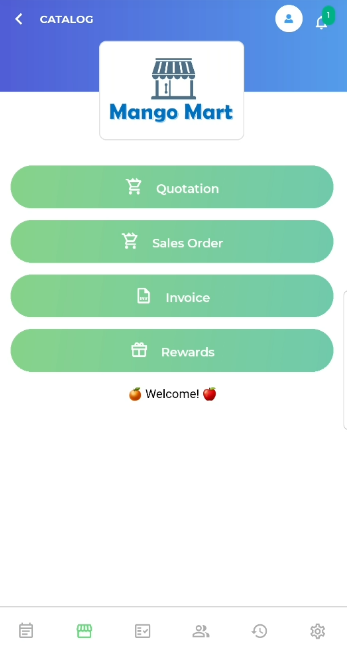
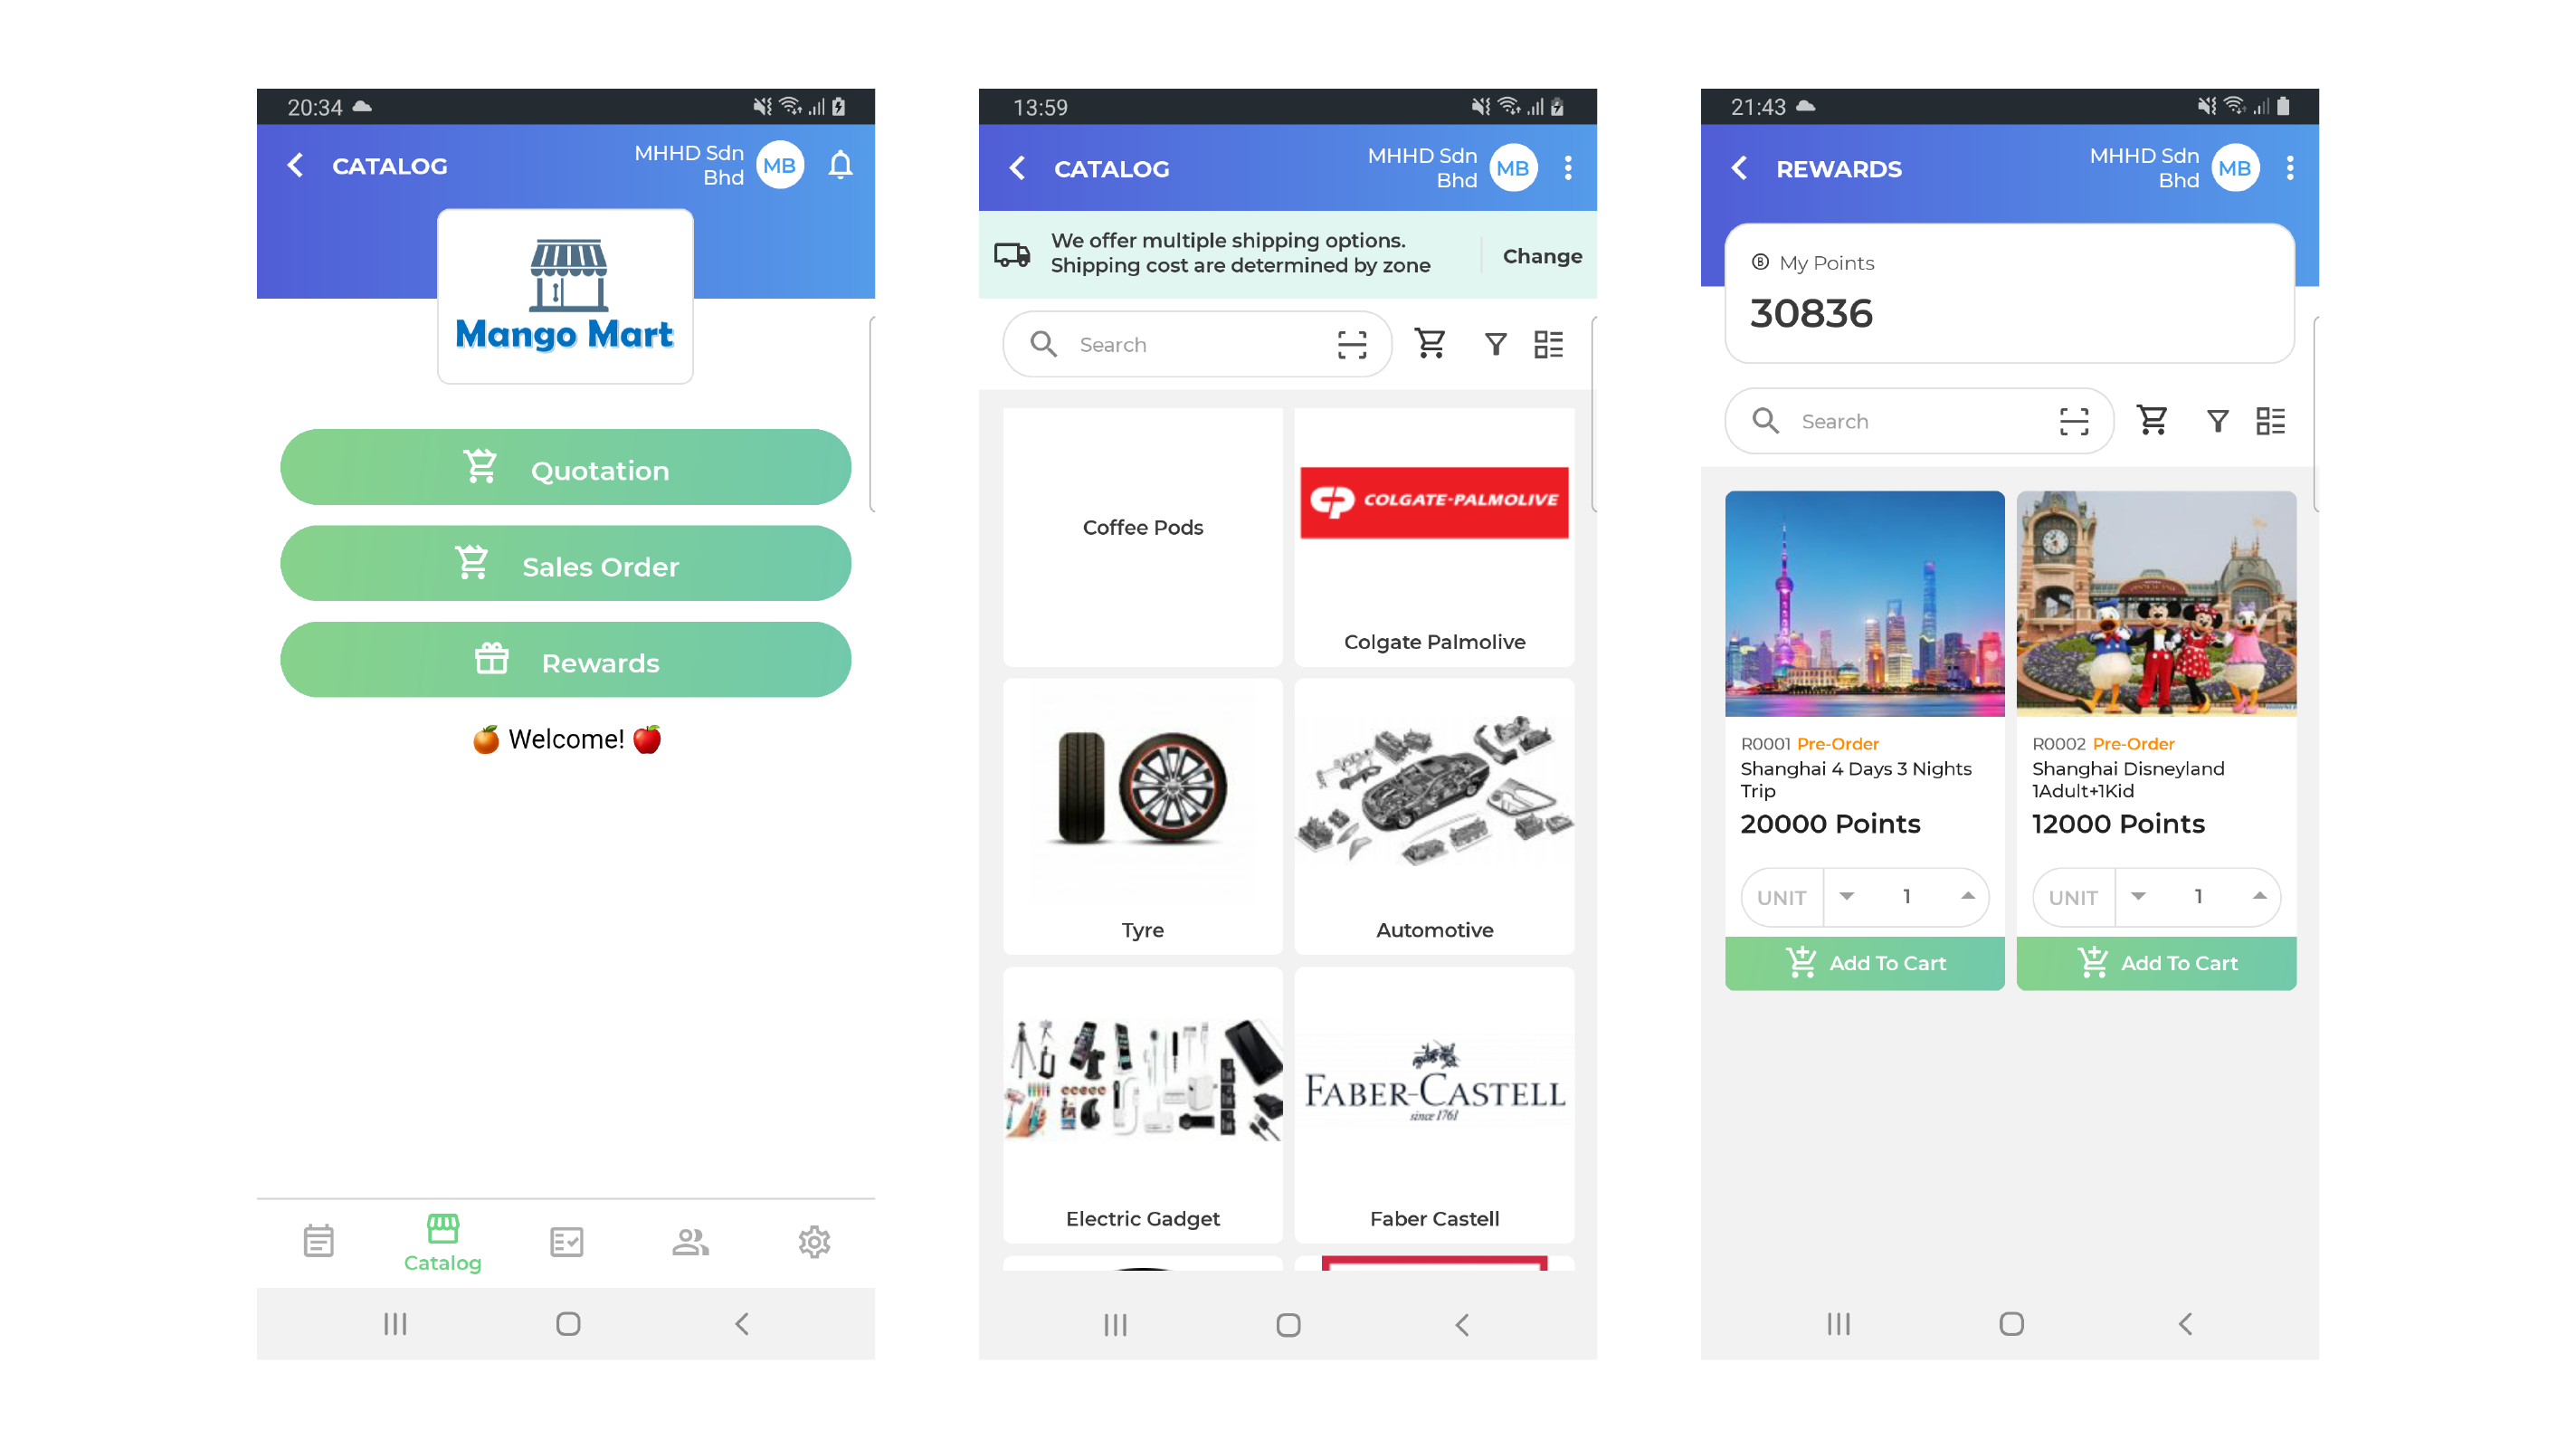
¶ Catalog
On the Catalog tab you can view your catalog and place orders by clicking on the Quotation or Sales Order button, depending on the type of document you'd like to generate.
To find out more about catalogs and placing orders, please refer here.
You can also view your points and perform point redemption by clicking on the Rewards button.
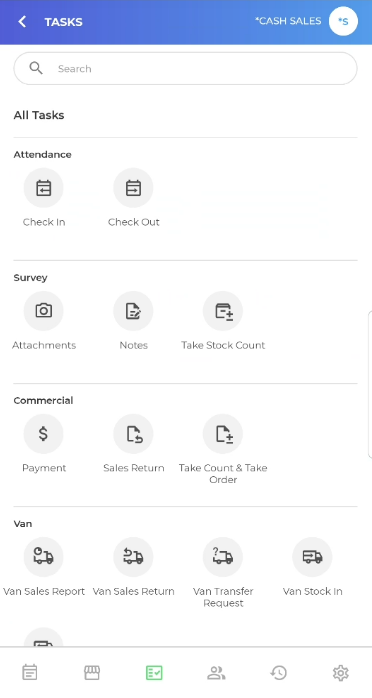
¶ Tasks
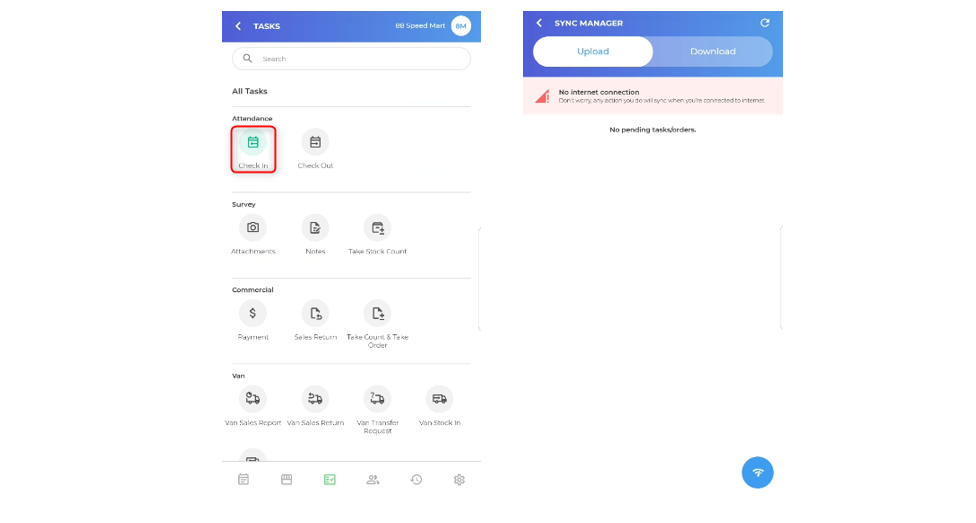
In an instance where you need to perform and new / additional tasks apart from the list in the To Do tab, click on Tasks. You will find a list of tasks that you can choose accordingly. You can also search for tasks by typing keywords in the search bar.
Please confirm your customer name on the top right of the screen before performing any tasks. To change customer, click on the existing customer name and select from the list provided.
Upon completion of task(s) the following icons will turn green as an indicator:
- Check In
- Check Out
- Attachments: Take Photo
- Notes: Take Note
- Report NND
- Report Forward Stock
- Count+Order
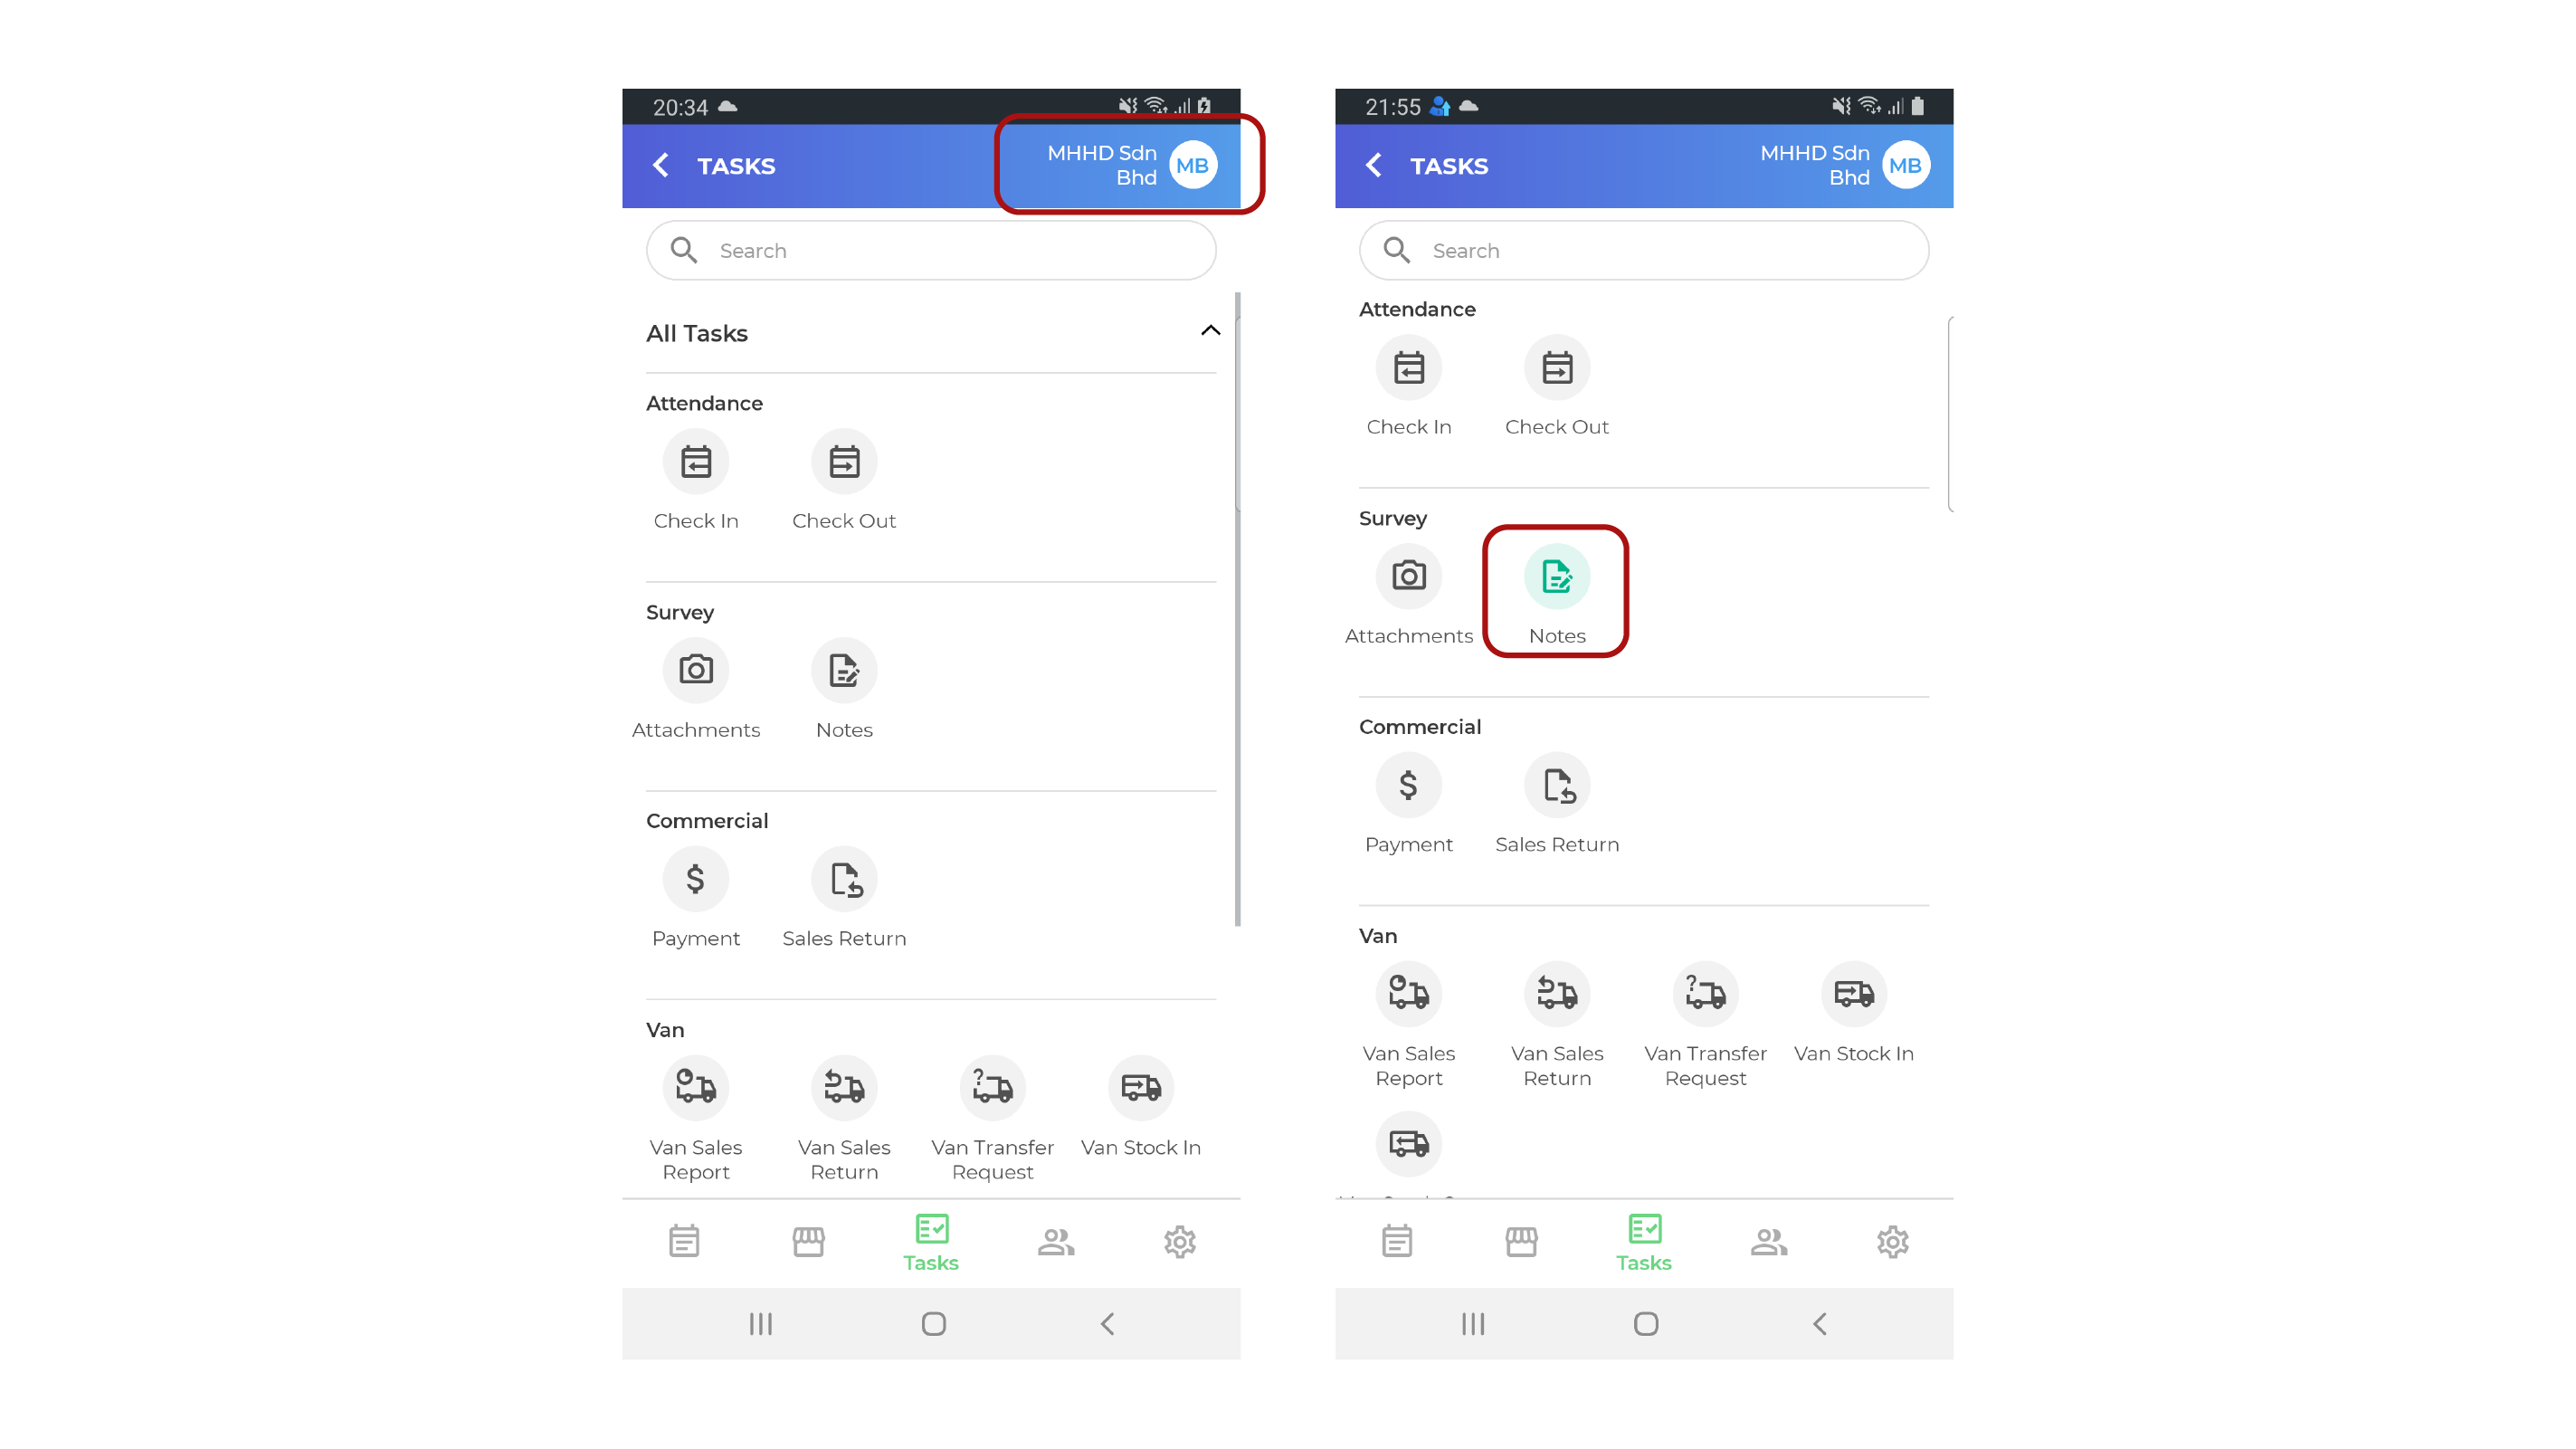
If the Tasks tab is empty, it is because no customer is selected. Click on Please select a customer on the top right corner of the screen to select customer.
Note: The Payment tab was one of the main tabs in the previous version of BO Rep. It is now placed under Tasks tab. You may find it under the Commercial section.
¶ Internet Connectivity
If you are at a location with weak internet connectivity, your icon will remain as yellow and will only turn green once a stable internet connection has been established. Rest assured that once the icon has turned green, your tasks will be successfully captured into your company's system.
.png)
¶ Checking pending tasks
1. You can check for all the tasks that are yet to be captured into your company's system at the “Sync Manager” in the “Setting” tab.
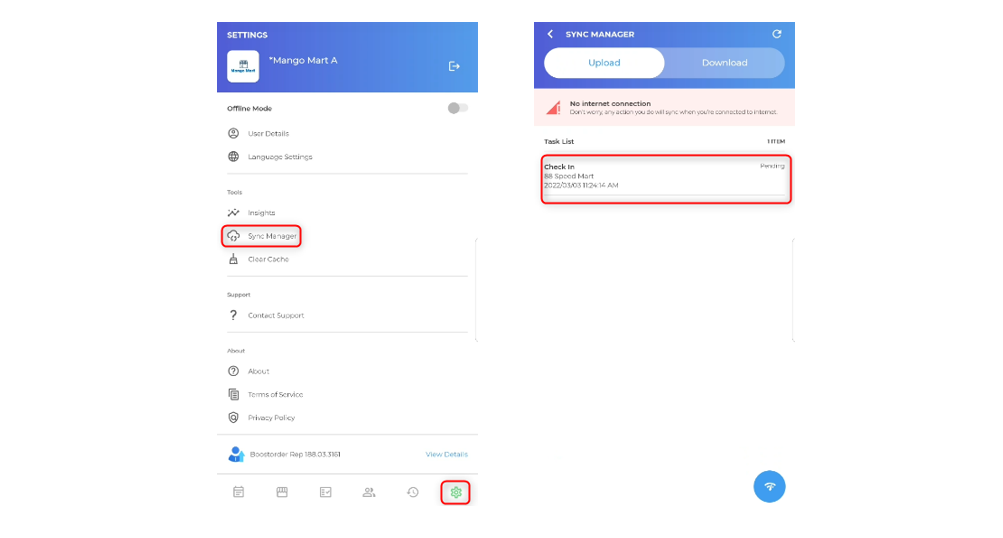
2. Once there is stable internet connection, the tasks icon will automatically turn green and there will be no pending task in the “Sync Manager”. Your tasks have been successfully captured into your company's system.
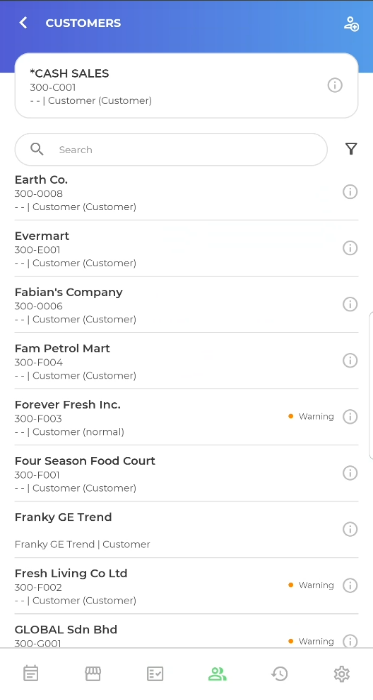
¶ Customers
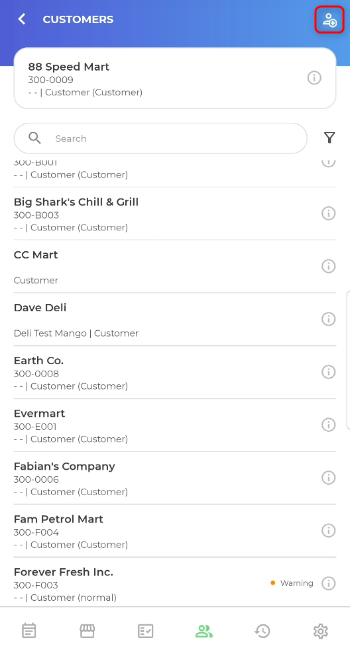
The Customers tab shows the list of customers.
¶ Add new customer
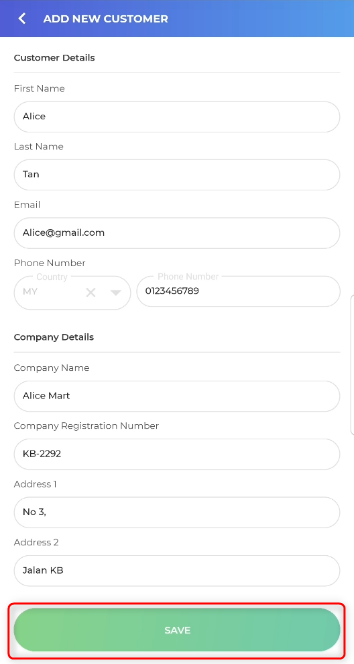
1. To add a new customer, click on the Add New Customer icon on the top right corner of the screen.
2. Fill in all the relevant customer details and press “Save”.
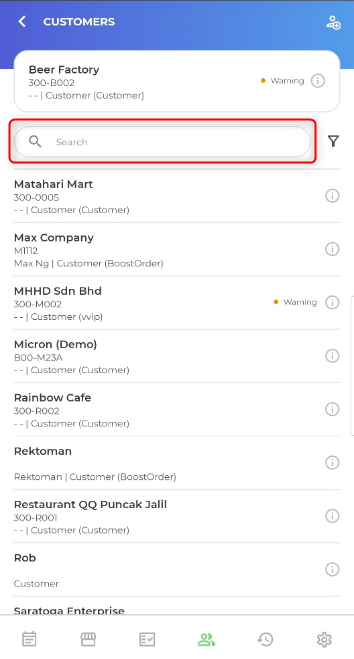
¶ View a customer history
There are 2 methods to view a customer history:
- Method 1: By clicking on the customer's name
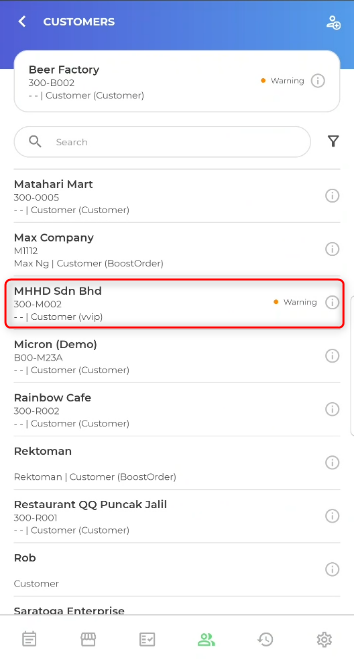
- Method 2: By using the search bar.
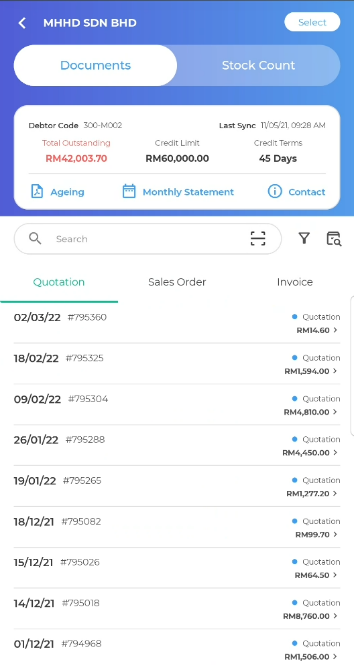
3. You may find the details of the customers such as their total outstanding fee, credit limit, and credit terms. You may find the following documents for the customers such as Quotation, Sales Order, Invoice, Credit Note, Payment.
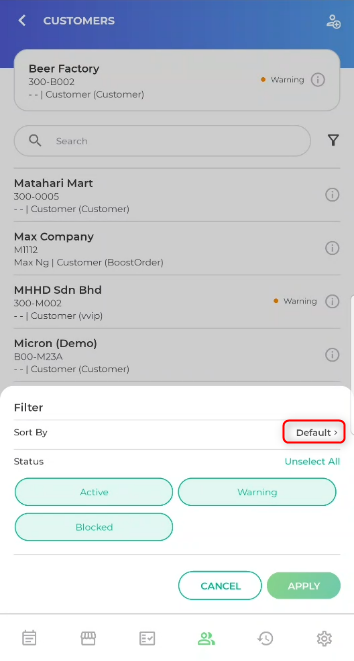
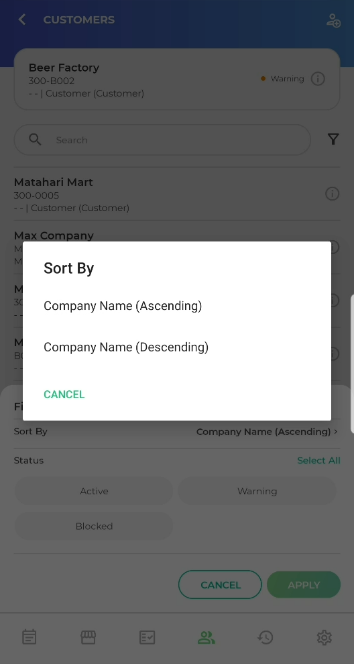
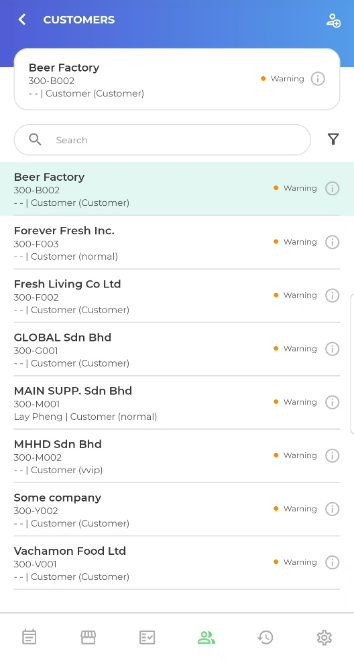
Sorting and filtering the customer list
By default the list of customers are sorted alphabetically. However, if you wish to change the list view, you can select the “Filter” icon to resort the list or filter the list.
1. Select “Filter” icon.
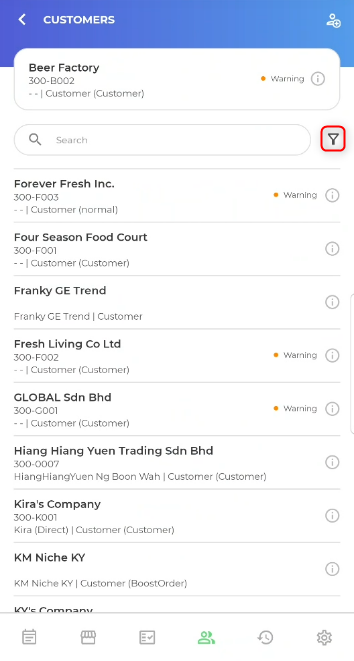
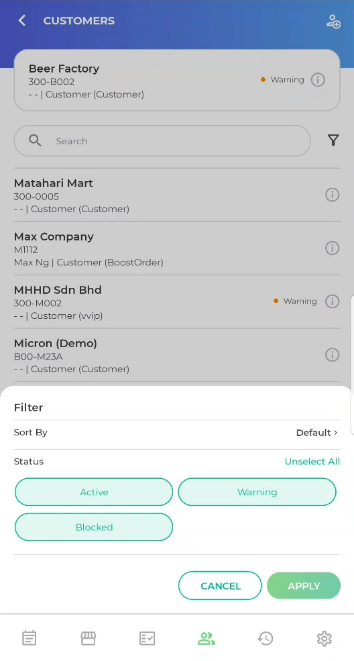
2. Click the “Sort by”. You can choose to sort the customer list by ascending order or descending order based on company name.
3. Besides sorting through alphabets, you can also filter by “Status” by first clicking “Unselect All”.
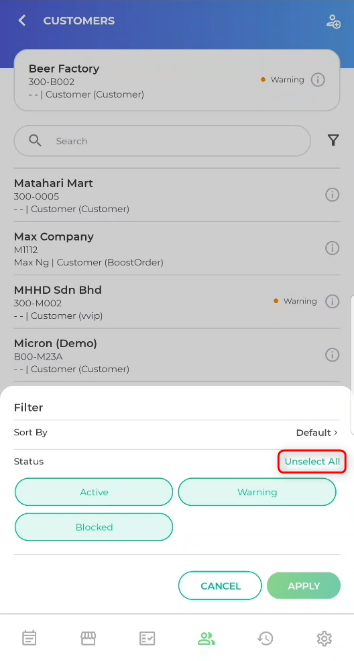
4. Click on the status that you would like to filter (to show on the list).
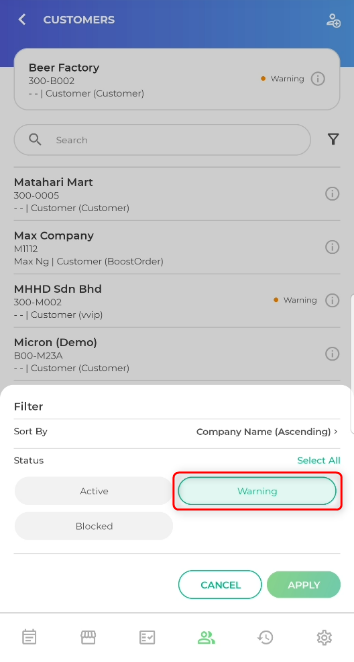
5. Click “Apply” to apply al the filters.
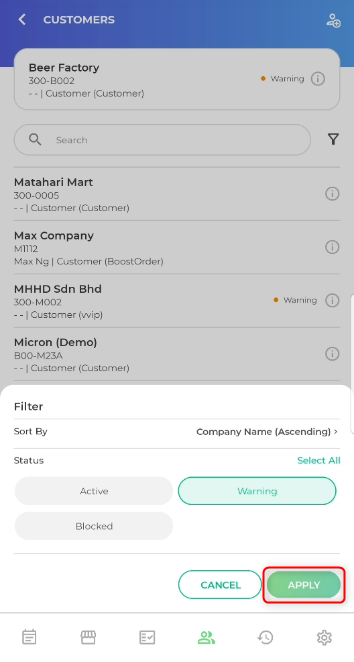
6. The customer list is now sorted according to your filter.
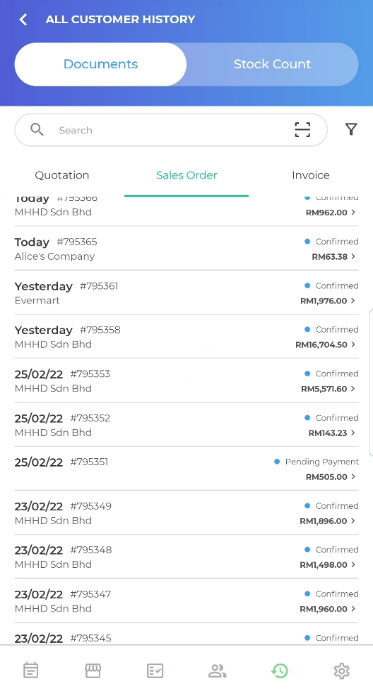
¶ All customer history
To view all customer history, click on the All Customer History. You may find the following documents for all the customers:
- Quotation
- Sales Order
- Invoice
- Credit Note
- Payment
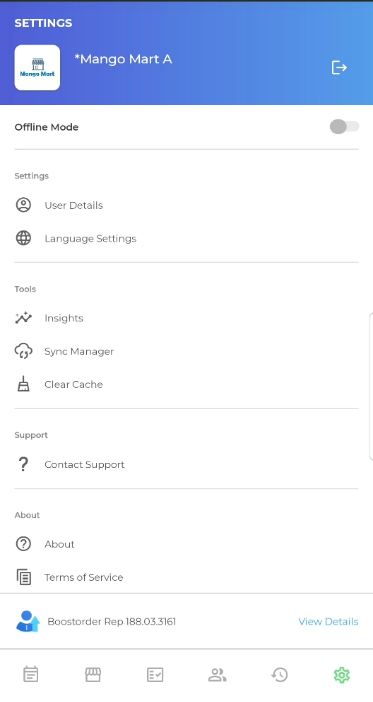
¶ Settings
The Settings tab allows you to:
- View your account details
- Set app language
- View insights
- View sync manager
- Clear cache
- Contact support
- View About page
- View Terms of Services
- View Privacy Policy
- View version history
- Sign out from your account (by clicking on the Sign out icon next to the supplier name)
